Printing Industry Exchange (printindustry.com) is pleased to have Steven Waxman writing and managing the Printing Industry Blog. As a printing consultant, Steven teaches corporations how to save money buying printing, brokers printing services, and teaches prepress techniques. Steven has been in the printing industry for thirty-three years working as a writer, editor, print buyer, photographer, graphic designer, art director, and production manager.
|
Need a Printing Quote from multiple printers? click here.
Are you a Printing Company interested in joining our service? click here. |
The Printing Industry Exchange (PIE) staff are experienced individuals within the printing industry that are dedicated to helping and maintaining a high standard of ethics in this business. We are a privately owned company with principals in the business having a combined total of 103 years experience in the printing industry.
PIE's staff is here to help the print buyer find competitive pricing and the right printer to do their job, and also to help the printing companies increase their revenues by providing numerous leads they can quote on and potentially get new business.
This is a free service to the print buyer. All you do is find the appropriate bid request form, fill it out, and it is emailed out to the printing companies who do that type of printing work. The printers best qualified to do your job, will email you pricing and if you decide to print your job through one of these print vendors, you contact them directly.
We have kept the PIE system simple -- we get a monthly fee from the commercial printers who belong to our service. Once the bid request is submitted, all interactions are between the print buyers and the printers.
We are here to help, you can contact us by email at info@printindustry.com.
|
|
Archive for December, 2023
Monday, December 18th, 2023

Photo purchased from … www.depositphotos.com
The Printing Industry Exchange Blog is #12 of the best 40 digital printing blogs, as selected by FEEDSPOT.
One of my print brokering clients is a “fashionista.” I have written numerous PIE Blog articles about her work. Her main printed product is a 3.54” x 1.42” color swatch book on a screw-and-post assembly that looks like a small PMS swatch book. It allows her clients to select complementary clothing and makeup colors based on their complexion. Over the years my client has expanded her product line into print books, an online presence, and (soon) clothing based on her proprietary color scheme.
All of my client’s products include illustrations of women with various hair colors and skin tones. These include cover art for 28 separate “master” copies of her color swatch print books. Among other things, my client is an illustrator, but drawing all of these cover models takes time.
AI-Generated Photography in My Client’s Work
With this in mind my client recently sent me about ten or so photos generated by Artificial-Intelligence (AI)-based photo generators she had found online. She had typed in various prompts, and the software had generated breathtakingly beautiful images that looked a lot more like photos than illustrations.
My client had asked my opinion. I gave it to her, and I also did some online research into the whole process (and legality, regarding copyright infringement) of AI image generators.
First of all I will say more about why this is relevant to my client. It’s not about attractive photos. It’s about what my client is really selling.
I told my client she was really selling beauty, magic, dreams, fantasy, and glamour. Feminist literature I perused also spoke of the “male gaze” (in less than glowing terms). My client’s vehicle for selling these intangibles is her proprietary color scheme. In much the same way, as she ventures into clothing lines, her products will be less about the fabric and style and more about how the colors themselves enhance the beauty of the person wearing the clothing.
With this in mind, let’s return to the photos. I will describe some of them. All of the women are stunning. They range in age from their twenties to sixties (my guess), blondes, brunettes, redheads, women with stunning gray hair. Latinas, African Americans, Caucasians. Beauty and diversity.
What they all have in common is that they look directly at the viewer.
This has been important since the dawn of painted portraits. When the subject of a painting or photo looks directly at you, this forms a bond between the subject of the image and the observer, much more of a bond than an image of a subject looking elsewhere. If the subject looks elsewhere in the painting or photo, the person looking at the image becomes an observer rather than a participant. The relationship at that point changes from a link between the subject and the observer to the subject’s relationship to her or his environment (possessions and/or people).
So it is understandable that my client chose only images gazing at the observer, photos that will be reproduced on her print book covers, web pages, and marketing collateral.
Actually, chose is not as precise a word in this context as created. She created (or the AI algorithm created) all ten of the images my client shared with me specifically based on text prompts. In fact, when I did some research on the subject, I learned that some of the AI image generators will accept figurative language as well as literal wording. That is, you can type in an allusion, metaphor, simile, famous quotation (presumably). My client typed in specific ages for the women, and then noted that all of them should be beautiful (a subjective concept), and that all should be looking at the observer. But the AI image generators apparently can go well beyond this.
In fact, I noticed one other thing about the ten images my client shared with me. The subjects’ eyes were not only focused on the observer, as noted, but they were “in focus” (which implies the subjects of the photos are/were “present” with the observer rather than lost in thought—or bored). That said, their gaze is slightly (just barely) softer in focus to imply romantic interest in the observer.
All of these characteristics work on the viewer. Subconsciously, but powerfully. Just ask any glamour photographer who takes pictures of models for clothing ads or cosmetics ads.
Fantasy
I also mentioned fantasy as one of the things my client sells with her proprietary color scheme. One image she requested had the subject in “period” costume in front of an iron gate and with Gothic architecture in the background (akin to the Gothic novel Jane Eyre).
In our current world, where everyday life is serious and now often dangerous, images of models (which my client will have selected or created very consciously to appeal to her clients) tied to people’s fantasies will go a long way. These will be images with characteristics to which my client’s clients will aspire.
As a rule, most, if not all, advertising is about either possessing something or becoming something. And since my client’s clients are all women, the photos my client creates with AI image generation technology will be aimed at encouraging her clients to become whatever they aspire to in their dreams and fantasies. They will do this by using my client’s color system to enhance their own beauty, their sense of glamour.
In short, I think my client is going in the right direction not only by focusing the “gaze” of the models on the observer but also by including some elements of fantasy. After all, romance novels are actually increasing dramatically in their popularity for a reason.
(From BookRiot.com: “NPD BookScan, a market research group, states that romance is selling more in 2022 than at any point since 2014. Its data shows unit sales of romance novels growing 41% in 2021 and growing even more in 2022.”)
Further Thoughts
One of my first thoughts in seeing my client’s selection of AI generated images was that the quality had improved dramatically since the last time I had seen such photos. These actually look like photos, even though the people in the images do not exist. Prior iterations of such images looked (to me) more like illustrations. And therefore they had a sense of being artificial, cold, and impersonal. Beautiful but lifeless. These images my client sent me, in contrast, exuded warmth.
To go back to the technology, which I can’t even begin to understand, I did read that the computer “learns” based on the words you type into the image generator, and this is reflected in the qualities and characteristics of the photos generated. To me, that’s incredibly exciting, as I think ahead five or ten years—or even just now.
I also saw some related attributes (technical rather than emotive and artistic) that pertain to image quality. For instance, one of the image “manipulators” acts as Photoshop might but goes one step further. I saw online how it removed all noise from the background of the image as well as the subject, improved the resolution of the image significantly, and possibly even added or corrected background and foreground detail based on an analysis of the subject.
Granted, a lot of this you could do with an image editor like Photoshop, but you would still get spotty results from enlarging or upsampling an image, and you would need not only artistic talent but also a lot of time to (essentially) paint in details.
(In the 1970s I did this with India ink, a tiny brush, and a photo. In the ensuing decades starting in the early ‘90s, I did this in Photoshop with the pen and paintbrush tools. Now the computer can analyze the image and do all of this for you instantly.)
Copyright
Based on my reading, if you choose to pursue AI generated imagery, I’d encourage you to research copyright requirements. Read the legal language accompanying the online AI generation engine. It seems that AI generated imagery can’t be copyrighted since it is not created by humans.
Then again, you may want to make sure your use of such images (particularly in promotional materials that generate money for you) does not expose you to liability. I haven’t seen anything worrisome yet, but it’s worth careful study, just as you would carefully read language from a royalty-free or rights-managed online photo bank.
In my estimation, this will be transformative technology. If you are involved in any aspect of commercial art or fine art (or commercial printing), you may want to read up on the subject.
Posted in Photos | Comments Off on Custom Printing: The Promise of AI-Generated Images
Monday, December 11th, 2023

Photo purchased from … www.depositphotos.com
The Printing Industry Exchange Blog is #12 of the best 40 digital printing blogs, as selected by FEEDSPOT.
A client of mine called me out of the blue this week and asked about options for 50,000 copies of a 4-color print book containing voting records from Capitol Hill. She needed the book to lie flat, though, and she knew this would drive up the price.
A Plethora of Choices
I told my client that most of the options would be expensive because of the handwork involved. These would include such mechanical bindings as Wire-O, Spiral Wire, Plastic Coil, and GBC (or comb binding). All of these methods are accomplished by hand with minimal automation, so a 50,000 press run would raise the price, beyond the extra cost of printing 4-color ink throughout the book text. But here’s what I told my client (which will also serve as a review for your own commercial printing work).
Spiral Wire
The bind edge of the book is drilled with little holes parallel to the trim and a coil of wire is fed into these holes. If you used a spiral notebook in school, you know what this is. You also know that the coil of wire can be inadvertently crushed. Spiral wire comes in a few different colors.
Another downside is that due to the nature of a coil, facing pages don’t align exactly when the print book is open and lying flat. In addition, the coils come only in standard sizes (widths) that accommodate standard page counts. If you choose this option, make sure your book printer offers spiral wire coils that will match your book length.
Plastic Coil
This is like spiral wire, but it is made out of plastic. Therefore, it has “memory.” It will squish up a little if squeezed, but it will come back immediately to its original form. This is a huge benefit. Again, it involves expensive handwork, it comes in only a handful of colors, and you need to make sure it will accommodate your print book page count.
Wire-O
Wire-O is metal (like spiral wire), but it is composed of double-wire loops that are parallel to one another and attached to a metal post running the length of the spine. The double wire makes the binding stronger than spiral wire, and the fact that the wire loops are parallel to one another (rather than in a spiral) makes the facing pages of an open print book align across the gutter. The same issues apply with the cost of handwork, page count, and color options.
GBC or Plastic-Comb Binding
If you completely unwind and flatten a GBC binding coil, it will look like a comb (hence the name). The tines of this comb are fed (i.e., handwork) through holes drilled in the book text block. When the coils jump back into place, you have a coil holding all the book pages together. What you also have (which is not available with Wire-O, Spiral Wire, or Plastic Coil binding) is a printable spine. Since the plastic has “memory,” it jumps back into place. You can therefore add or remove pages, but in my experience over the years the pages always seem to pull out, fall out, or tear out.
3-Ring Binder
This is an interesting option because you can easily add or remove pages. It’s the same as the binders you had in grade school. Binders come in numerous spine widths, so the page count of the print book need not be an issue. You can even print the text block, shrink wrap it, lay it inside the closed binder, and make the reader assemble the product.
Background vinyl colors are numerous, and some even have clear plastic pockets heat welded to the outside of the binder to allow you to insert slipsheets. That is, instead of custom screen printing art and text on the outside of the vinyl binder (which would be an expensive addition), you can print 4-color single sheets that you can slip into pockets on the front and back covers (and spine), embellishing the binder without paying for screen printing.
Layflat Perfect Binding
Somebody really earned their money when they invented this bindery method. Apparently it’s durable (I was worried, so I checked). And it really is much the same as case binding (hardcover, edition binding) in its approach.
Here’s how. On a perfect-bound book the stacked, printed press signatures are notched or ground off at the bind edge. Then glue is applied to the spine edge of the text block. Finally, a paper cover is wrapped around the text block, adhering to the spine and a slight bit of the front and back cover. Then the book printer trims the book.
In contrast, on a case-bound print book the text block is not attached to the spine. It is glued to a “crash,” (also called a “super” or “liner”), a piece of gauze running the length of the spine and extending slightly outward on both sides. In the case-bound book these gauze flaps are attached to the front and back (binder’s board) covers of the print book and then covered with the endsheets and flyleaves (end papers).
So the text block essentially hangs on the edge of the front and back covers and (in most cases) is not attached to the (inside of the) spine.
Layflat perfect binding works the same way, but instead of using thick binder’s boards (front, back, and spine covered with fabric or leather), the binder attaches the print book text block (all printed, gathered, and stacked press signatures) to a gauze strip, which he then attaches to the edges of the front and back (perfect binding) paper covers. Just a strip is enough (just like case binding).
The text block never touches the spine, so the book lies flat when open on the table. In fact, this option is often used for photo books (personally printed for you using your photos) in stores like Costco, because the open pages (which align perfectly with one another) make full-bleed photos seem to be connected at the spine as if they were one huge, double-page, full-bleed photo. The overall experience is breathtaking.
This does not involve that much handwork (when compared to the mechanical bindings noted above), so the overall cost per unit does not have to be prohibitive, even for longer press runs.
The process (only one of the variants of layflat binding) is called Otabind.
And here are more characteristics/features/benefits:
- The glue used in the process is a hot melt, exceptionally durable glue (EVA, PVA, or PUR glue). So the print books last a long time, and pages don’t easily pull out.
- The cover is scored a number of times (at the spine, and outward from the spine parallel to the bind edge). This scoring, along with the fact that the text is not actually attached to the spine, allows for an extremely flexible and durable book which will lie flat when open.
- This process, especially because of the specific glue used, when combined with deep “notching” (cutting notches into the bind edge of the folded press signatures to allow the glue to really seep in), provides surprising strength.
The Takeaway
No matter what you want to do in printing, there are usually a number of ways to do it.
That said, those methods requiring lots of handwork will be expensive (overall and on a unit-cost basis, because there are no economies of scale for handwork). With that in mind, such automated layflat options as Otabind can help make up for this.
If, on the other hand, you only need (as an arbitrary, small number) 200 copies, you might choose vinyl binders, Plastic Coil, Wire-O, Spiral Wire, or GBC comb binding. These are especially good for cookbooks and manuals, or anything else you need to refer to when you’re using both hands for something else.
Posted in Book Binding | Comments Off on Book Printing: Options for Layflat Binding
Sunday, December 3rd, 2023
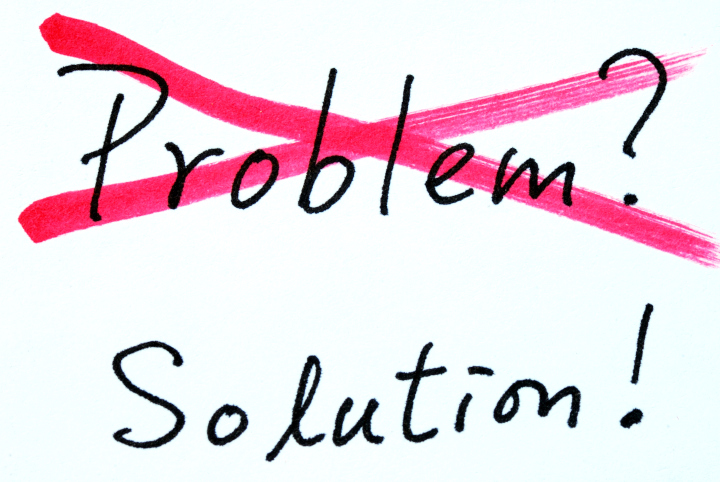
Photo purchased from … www.depositphotos.com
The Printing Industry Exchange Blog is #12 of the best 40 digital printing blogs, as selected by FEEDSPOT.
When you design a print product and/or buy commercial printing services, sometimes problems arise. Printing is a complex process not only in terms of logistics but also in terms of design issues and art file preparation issues.
The very best way to avoid errors is twofold:
- Put everything in writing. Craft an ongoing specification sheet, which you can then alter for each job, or kind of job, as needed. You can start by closely reading a number of printer’s bids. These will give you ideas, which you can expand upon over time. I’ve been changing and updating my base spec sheet for over 40 years. The more I learn about commercial printing, the more I tweak this document. And each time a totally new kind of work comes up (like a sample case for pieces of flooring, for which I brokered custom printing services a few years ago), I add even more specifications and/or massage the ones already there. This document is the main communications device between you and your printer, addressing everything from design specifications to file preparation to printing, binding, and delivery.
- Proof early and often (to misquote the mid-19th century political saying). Back in the day (the ‘80s and ‘90s), our proofs weren’t as comprehensive as now. Make sure you see as many proofs as you need to at the highest level of detail you can, showing all color, all images (pretty much all of this is commonplace now). But review them closely during the printing process. Don’t edit copy at this stage, but do have relevant decision-makers in your office review them, too. Proofing is an investment, not an expense.
Client Errors: My Own Biggest Error and and a Colleague’s Error
Either you created the problem or the printer did. Those are the two options. That said, some flaws are just embarrassing, while others make a project unusable. It’s important to make an honest assessment. Here’s a mistake I made early in my career as the art director/production manager for a nonprofit government education organization.
I had designed a poster (approximately 3-feet wide by 4-feet tall) with an image of the Capitol as the background. I had positioned around the Capitol dome a number of illustrations of students drawn by a famous cartoonist that worked with my organization. I left it to the printer to do all of the photo compositing work. But the problem was that I had started with a 35mm slide of the Capitol. Back then, since we didn’t scan our own images, we didn’t see the enlarged film grain (silver halide, the old process prior to digital). We only saw this patterning of the film grain (and somewhat soft focus) at the proof stage. I had enlarged the image, which already had a lot of grain (since it was an especially fast, or light sensitive, film). At the very least I should have used an 8” x 10” press-camera image or (if that had not been an option) a 2 ¼” square-format image. (We didn’t have digital images back then.) The larger-sized negative would have been more detailed at that size with more gradations of color and less film grain. Therefore it would have yielded a better print.
What We Can Learn
I made the mistake. Because we saw the problem at the proof stage, we didn’t have to make the decision whether to reprint or live with this. We decided to embrace the patterning and call it a mezzotint. But I learned something.
So in the case of your own design and print buying, if you need a huge photo, buy the reprint rights to one and make sure it’s huge. Never enlarge a photo. You’ll see grain patterning (if it’s a silver halide print) or pixelation (if it’s a digital image). You can get these images online (we didn’t have that option back in the ‘80s and ‘90s).
Fortunately, now all images will have been incorporated into your design file before you send it to the printer, so check the color, resolution, placement, cropping, etc., of all images and then request a “contract-quality” proof from the printer.
All of these steps should ensure your success. But remember, never enlarge. Only reduce.
One other thing to remember is that if you do need to reprint a job due to an error (one of my print brokering clients had to do this a few years ago due to problems with her color choices and positioning of solid inks), your printer may only charge you his cost (without his added profit percentage). This may be negotiable. It doesn’t hurt to ask, and that can make a difference.
Printer’s Errors
When I was an art director, a commercial printing vendor “flopped” a photo. That means that when he stripped the photo negative into the composite negative from which the plates were made, it was “wrong reading” rather than “right reading.” I asked for a reprint for the following reason. The image included the organization’s logo prominently displayed (on a podium sign, so it was very visible). And it was backwards. Since it had been correct on the blueline proof and then had been changed (in error) between this proof stage and the final printed piece, it was the printer’s fault. He had to pay for the reprint.
I also made the printer reprint the CEO’s letterhead after it arrived with the two colors of the logo out of register. Unfortunately, even though these two jobs were worthy of reprinting at the printer’s cost, our organization did get a bit of a reputation in the local pool of custom printing suppliers as being a problem client. That’s why I’d encourage you to use discernment and honesty when you decide whether a printing flaw is annoying or whether it renders the job unusable.
Another job doesn’t really highlight an error but rather a potential risk of an error. A local magazine wanted to print an invitation for a special event. I suggested seed paper (they could actually plant the printed invitations, and flowers would grow from the seeds in the paper). I contracted with a printer on the East Coast, and then I bought the seed paper from a vendor in the Midwest and had it shipped to the printer. Unfortunately, many of the sheets of seed paper jammed the East Coast printer’s digital press. (They were not of equal thickness across the entire sheet.) Due to the excessive spoilage, the printer almost didn’t have enough paper for the job.
If I had this to do over, I would have had the printer buy the paper rather than buying it for him. He would have known exactly what to buy and how much. Fortunately, this was a problem that didn’t quite happen, but it almost did, and it would have been bad. Best to learn from it.
The third example had to do with a small-format perfect-bound book of flower photos. Each page spread had a flower on the left and a pithy quote about life on the right. It was intended to make you think about the simple joys and beauty of life.
The background of the front cover, back cover, and spine was a black solid with heavy ink coverage. Over this black ink, the printer added a dull film laminate. Unfortunately, the black solid ink was not completely dry when the printer added the laminate. Therefore the ink produced a gas as the liquid ink vehicle evaporated, and the gas made the cover coating bubble. None of the books were usable.
The vendor stepped up. He took off the covers and reprinted them, and re-applied them to all the text blocks once the ink had dried and the covers had been laminated. Then he trimmed the books a second time. Fortunately, I had left a little wiggle room around all art elements close to the exterior cover trim. So what might have gone from “close to the trim” to “painfully close to the trim” didn’t occur.
So in your own design and print buying work, always, always, always remember that replacing print book covers renders the overall book smaller than you had planned. Therefore, keep all live-matter type and imagery away from folds and the trim.
What We Can Learn
The first scenario (with the flopped photo) should never happen again, given the fact that you, as a designer, will always either buy or scan the images yourself. That said, if anything ever goes wrong between the printer’s contract proof and the final job, you have proof that it was the printer’s responsibility.
The second scenario pertains to color register. If colors are out of register, that is a printing flaw. Your printer should look for this during the press run. That said, some problem press sheets may slip through, so be aware. Colors out of register can also create color shifts within photos, especially in neutral colors.
The third scenario with the book covers provides several life lessons.
As noted above, keep wide margins–even if you never have to replace print book covers in the course of your career. This includes—especially–where you position the page numbers (folios). They can also become “too close for comfort” in saddle-stitched print books with longer page counts. Pages close to the center of the book will be pushed out slightly from the bind edge, and folios close to the center spread can get too close to the trim or be trimmed off entirely.
Work with vendors who will take responsibility for their actions. If the error is truly theirs, they will acknowledge this and give you some options. (For instance, the printer only reprinted and reattached the covers because there was nothing wrong with the text blocks. There was no reason to reprint the entire job. I continued to work with this printer for many years thereafter.)
Assume there might be problems with drying and coating operations when you’re printing heavy-coverage inks. You may want to ask the printer about this.
The Takeaway
I have made my share of errors. I lived through them. I also learned from them and never made them again. Fortunately graphic art file preparation in 2023 gives you more control than I had in the 1980s and 1990s because you can see the complete pages on your computer, your inkjet printer, and your printer’s “contract proof.” You can usually see the errors before they happen. That’s a blessing.
Always seek to develop mutually beneficial, long-term relationships with printers. Price should only be one component of your decision to go with a specific vendor.
If problems do occur, try to work with the printer dispassionately to find a solution. It’s human nature to want to lay blame, but it doesn’t solve your problem. Maybe you need a reprint. Maybe you only need a discount.
Posted in Printing | Comments Off on Custom Printing: Printing Problems, Problems, Problems
|
|