Printing Industry Exchange (printindustry.com) is pleased to have Steven Waxman writing and managing the Printing Industry Blog. As a printing consultant, Steven teaches corporations how to save money buying printing, brokers printing services, and teaches prepress techniques. Steven has been in the printing industry for thirty-three years working as a writer, editor, print buyer, photographer, graphic designer, art director, and production manager.
|
Need a Printing Quote from multiple printers? click here.
Are you a Printing Company interested in joining our service? click here. |
The Printing Industry Exchange (PIE) staff are experienced individuals within the printing industry that are dedicated to helping and maintaining a high standard of ethics in this business. We are a privately owned company with principals in the business having a combined total of 103 years experience in the printing industry.
PIE's staff is here to help the print buyer find competitive pricing and the right printer to do their job, and also to help the printing companies increase their revenues by providing numerous leads they can quote on and potentially get new business.
This is a free service to the print buyer. All you do is find the appropriate bid request form, fill it out, and it is emailed out to the printing companies who do that type of printing work. The printers best qualified to do your job, will email you pricing and if you decide to print your job through one of these print vendors, you contact them directly.
We have kept the PIE system simple -- we get a monthly fee from the commercial printers who belong to our service. Once the bid request is submitted, all interactions are between the print buyers and the printers.
We are here to help, you can contact us by email at info@printindustry.com.
|
|
Archive for August, 2022
Wednesday, August 31st, 2022
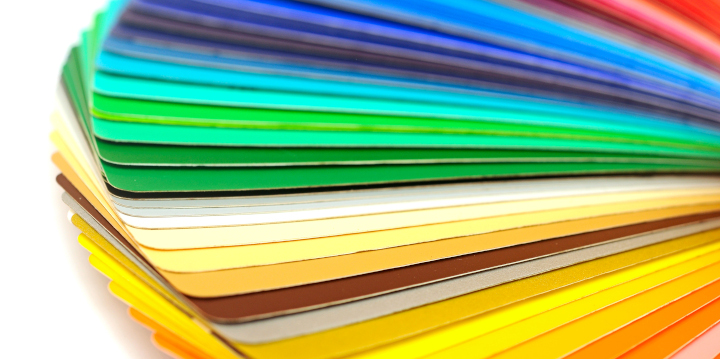
Photo purchased from … www.depositphotos.com
I have a print brokering client I’ve mentioned before who produces a collection of 28 color swatch books, like PMS books, for selecting clothes and make-up based on complexion. She’s a fashionista, and her product is really her color system, not her print books. My client has developed a unique color system, and this system is scalable.
In addition to the small color swatch books my client reprints maybe three times a year, she has a collection of chin cards, 8.5” x 11” laminated cards with a little die-cut in the long side of each card. You can hold these under your chin and make your own decisions of which colors are right for you by looking in the mirror using my client’s guidelines. (This is my somewhat simplistic version of the process.)
My Client’s New Fabric-Printing Opportunities
Over the last few years my client—who has a large following—has attracted the interest of entrepreneurs in Europe who want to apply her color system to fabric printing (bolts of fabric) and garment printing (the clothes themselves). A great idea. This is very hot now. Perhaps these entrepreneurs will dye the background of the fabric one color and then add either inkjet or dye sublimation printing for the designs on the fabric, depending on the material substrate.
This week my client noted that she and her potential business partners were not sure how to communicate color to manufacturers. Initially, my client had chosen specific PMS colors for her color swatch book pages because of the precision and repeatability of the Pantone Matching System, not to mention that these colors are universally recognized by commercial printing suppliers.
Since her color swatch book system includes 28 distinct versions, many with repeats of various colors, my client had chosen to print her swatch books on an as-needed basis on high-end digital commercial printing equipment (such as the HP Indigo). Because of this my client had converted all of her colors to the nearest CMYK process builds. Percentage combinations of screens of these four colors came close enough (for my client’s needs) to simulating the 100+ specific colors distributed across the 28 separate color swatch books. And this way my client would not incur the huge cost of needing to print via offset lithography—instead of digital printing–using a huge number of PMS inks for a huge number of press runs (and for so few copies of each of the 28 master versions of the color swatch books).
(Keep in mind that custom printing ink companies formulate PMS, or Pantone Matching System, colors by mixing other colors–such as so many parts of Rubine Red or Rhodamine Red and so many parts of white.)
You can simulate the greater percentage of colors within the Pantone Matching System gamut with cyan, magenta, yellow, and black halftone screens laid over one another, but you can’t translate all PMS colors into matching—or even attractive—CMYK builds.
Why? Because the range of printable colors within the PMS color gamut is larger than the CMYK color gamut, just as the RGB color gamut (used for creating color with light–rather than pigment–on a computer monitor) is larger still, and the color gamut for visible light (i.e., colors distinguishable from one another by the human eye) is the largest of all.
You can find these different color gamuts superimposed over one another via Google Images. Such a composite, and visual, model will help clarify this concept.
Colors on Computer Monitors
So my client has needed to display her collection of proprietary colors online in recent years. Fortunately, there are online applications that will translate CMYK percentages to RGB percentages.
(Keep in mind that combining all subtractive colors—the CMYK colors of pigment–produces black, while combining all additive colors—the RGB colors of light on a computer monitor–produces white.)
Therefore, you can see that communicating color to another person (a commercial printing supplier or someone who dyes fabric, or a computer geek who writes computer applications in hexadecimal code) can be challenging. And this is becoming problematic for my client at the moment, since she needs to print consistent colors digitally for her color swatch books and her chin cards, include accurate color in her online materials, and potentially move into fabric printing and perhaps even cosmetics.
(And as noted above, once you bring computer monitors into the mix, you sometimes must also translate from RGB–red, green, blue–into hexadecimal code. Plus, you need to make viewing conditions consistent by limiting ambient light with a monitor hood and window coverings. And you need to standardize the monitor regularly with color calibration hardware and software. So the process becomes increasingly complex if you need precise color fidelity.)
Choosing Color for Fabric Printing
Now my client will need to translate her proprietary color system for selecting make-up, clothes, and hair coloring from ink on paper to fabric inks and dyes and possibly cosmetics as well, at some point.
Fortunately, computer design programs such as Photoshop, Illustrator, and InDesign have an ability to translate PMS colors into CMYK colors. You can even do this automatically when you distill a native InDesign file into a press-ready PDF. And I’ve also found online translators that convert PMS colors to both the nearest CMYK version for commercial printing and the nearest RGB version for display on a color-controlled, color-calibrated monitor.
A Final Approach to Color Choices
That said, I am still a firm believer in using one’s eyes and physical products (not a computer monitor) to make color decisions. So when my client asked me to talk with her prospective business partners in Athens, Greece, about how to proceed, this is what I said:
- Start with my client’s PMS colors, from which she developed her entire color swatch book system. Then match these as needed using CMYK and RGB percentages. All commercial printing suppliers will understand this color model. Plus my client’s offering to the business is her proprietary color system and the reasoning behind these color choices, not a specific physical product. In fact, if she goes on to make cosmetics after she makes colored garments, Pantone will still be the most universally understood color system.
- Over the years, PMS colors have expanded into metallics and pastels, and even their regular color system has been enhanced numerous times to include distinct, new colors. There are even special PMS books for plastics and now for fabrics (TPX colors, for instance). Pantone created and has maintained the original color system. Since their brand is very well regarded and their focus is solely on color, it is reasonable to expect that PMS colors will be as consistent as possible on both the original paper color chips and the new fabric color chips.
- That said, since fabric absorbs inks and dyes (and may change their perceived color in the process), and since the base color or tint of the fabric substrate may differ from that of the paper substrate, my client and her prospective business partners should request printed samples—on fabric—to ensure a match. They should not rely solely on computer translation algorithms.
- My client and her business partners should view physical-product color in 5000 degree Kelvin light–which is comparable to the color of sunlight–ideally with a neutral gray background to minimize color casts from any nearby color.
- My client and her business partners should remember that everyone sees color differently and that women see color better than men. In fact, if you cover first one eye and then the other and look at a color, it will look different to each of your individual eyes.
The Takeaway
I’m sure my client’s new business partners were exhausted after this discussion, as you may be. So I will simplify this. In your own design work, remember:
- Monitor colors are created with light. Almost everything else is created with pigment. These colors are not the same. Choose color from physical swatches (ideally a PMS book created within the last few years, since light changes the colors in these books over time), not from the monitor. Then use CMYK or RGB percentage numbers available in online translation programs or in Illustrator, InDesign, and/or Photoshop to simulate the colors as needed, depending on whether you’re creating a printed product or a product for online use.
- Remember that the tint of the substrate as well as its absorbency will change the color of the ink or dye printed on it.
- You will notice that Photoshop, Illustrator, and InDesign may use slightly different percentages of CMYK or RGB to simulate PMS colors. This is one reason that it’s always best to get a printed sample of the physical product you are creating. At that point you can use your eyes (and those of your coworkers) to decide whether the colors meet your expectations.
In the final analysis, trust your eyes.
Posted in Color Theory | Comments Off on Custom Printing: One Print Client’s Approach to Color
Sunday, August 28th, 2022
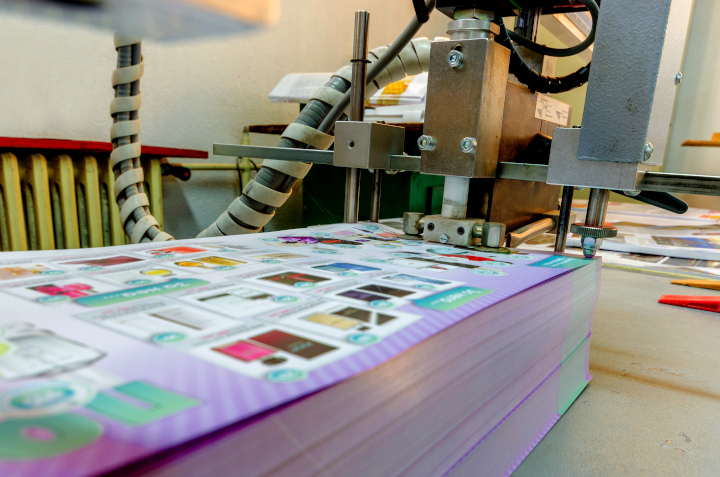
Photo purchased from … www.depositphotos.com
Foresight saves you money, among other things. This is as true in commercial printing as it is in most other arenas of life. Printing paper is expensive (or even scarce at the moment in the United States). Therefore, it is smart to understand how to use it efficiently (i.e., how to avoid wasting space on a press sheet and trimming away and discarding unused, blank paper).
Signature Press Work
Perfect-bound books and saddle-stitched books are composed of signatures. Let’s say you have a 40” press, and your press sheet is 25” x 38”. If you lay out four 8.5” x 11” pages across the top of one side of the sheet and four pages immediately below these, and then you do the same thing on the back of the press sheet, you can print 16 pages at the same time. These pages will take up 34” along the 38” side and 22” along the 25” side. On either dimension there’s a little room for bleeds (which extend 1/8” beyond the trim), gripper margin (the mechanical device that grasps the press sheet and moves it into the press), and the printer’s control bars and targets (used to measure and maintain accurate and consistent color and to catch other press problems as well).
This is not an accident. Many years ago a commercial printing press manufacturer came up with the most prudent ways to produce multiple print book pages (that were in most cases based on a US-standard 8.5” x 11” page size) with minimal waste.
Once printed on one side, these press sheets can be turned over and fed back into the press to “back up the sheets” (print the opposite side). In most cases this is after a considerable amount of drying time to avoid the ink’s smearing and setting off onto the back of other wet press sheets, but if the printer is using UV inks cured instantly with UV light, the backing up process can conceivably be done immediately.
What this means is that a print book can be broken down into 16-page signatures (or, presumably, 4-page or 8-page signatures as well). That is, a 64-page book can be printed in four press runs (4 x 16 pages). If the press (and therefore the press sheet) is large enough, or the page size is small enough, even larger signatures can be printed. So, for instance, a 64-page book might be able to be printed as two 32-page signatures (two press runs rather than four). And the best thing is that the actual print book pages, along with the printer’s control targets, bleeds, and gripper margin, will take up the entire press sheet with minimal if any waste.
Once the commercial printing is complete and dry, the sheets can be folded and trimmed. And due to the position of the print book pages on the press form, once trimmed and folded the apparently random placement of pages on the press sheet will yield a trimmed and folded press signature with all pages in the proper order. Again, the printing press manufacturer was thinking ahead.
This is the basis of all press signature work (print books, catalogs, etc.), with pages constituting multiple, sequential press signatures.
Other Work That Doesn’t Involve Press Signatures
But what if you’re printing pocket folders? That’s not signature work, but you still want to avoid wasting paper. Another way of saying this is that for a pocket folder (open flat, with all the soon-to-be-die-cut slots and tabs), you want to take the space you need on a 25” x 38” (or other sized) sheet, but you don’t want to leave the other space blank. Anything left blank goes in the trash and you still pay for the waste paper. So maybe you can fit two pocket folders (flat, uncut, and unassembled) side by side on a press sheet. Less wasted paper. Great idea.
But it doesn’t stop there. Imagine six 8.5” x 14” newsletters on a press sheet, or four 8-page brochures side by side, or nine 4.5” x 6.25” greeting cards imposed on the press sheet (you can see drawings of these on page 96 of a book by Mark Beach, PhD, and Eric Kenly, MS, called Getting It Printed, which a close friend gave me thirty years ago and which is still my go-to book on custom printing).
Now think about this. In press signature work you position all different pages on a press sheet (no duplicates), but you can print 16- or 32-page signatures and therefore produce a long print book with fewer, rather than more, press runs (i.e., faster and at a lower cost).
In this case you’re doing something similar. You’re producing multiple copies of a final printed product simultaneously on one press sheet. Therefore you can not only save paper but also print your desired number of copies significantly faster than if you hadn’t ganged up the identical printed products on the press sheet. Faster equals less money spent.
Sheetwise, Work and Turn, and Work and Tumble
If your “multiple-up” pocket folders, business cards, flyers, newsletters, greeting cards, or whatever, all face the same direction on the press sheet, you print one side, let it dry, and then “back up the sheet” by printing the other side.
If all printed products face the same way on one side of the sheet, and you need to turn over the pile of printed sheets to print the opposite side, you must first change the printing plates so the opposite side of the press sheet prints correctly. This is called printing a job “sheetwise.”
But if you have half of the job facing up and half facing down (let’s say the back and front of a pocket folder), you can set up the plates on press in such a way that you only need to turn the pile of press sheets over once the ink is dry before “backing up the sheet.” That is, you don’t need to change the printing plates. This is called either “work and turn” or “work and tumble.”
The major difference between “work and turn” and “work and tumble” is the direction in which the stack of printed sheets must be turned (along the long or short dimension of a 25” x 38” press sheet, for instance). Your printer will determine which will be more efficient relative to the printed artwork, but again the main difference compared to “sheetwise” commercial printing is the fact that you use the same plates and therefore save money in platemaking and wash-up/makeready processes.
That said, if you want to use different colored inks on the front and back of a press sheet, it might actually benefit you to run the job sheetwise. That way you can print two PMS colors on one side, let them dry, change plates, and then “back up the sheet” using new plates and new ink colors.
Up vs. Out
This is a fine point and may be somewhat confusing.
When you say a press sheet contains four 8-panel brochures printed “four up” and “four out” (using one example from page 96 of Getting It Printed), that means there are four identical, complete printed products on a press sheet. You get four identical products when you fold and trim the press sheet.
In contrast, when you print fifty business cards at once on a press sheet and each one has a different person’s name, then the correct terminology is “50 up” (50 images laid out on a press sheet) but only “one out” (since each printed product is slightly different from all the others).
Another way of saying this is that “up” refers to how many products are physically laid out on a press sheet, while “out” refers to how many of them are the same.
The Takeaway
To avoid confusion, the best thing you can do is take this information to your printer, go on a press tour, and ask to see samples on press of sheetwise, work-and-turn, and work-and-tumble jobs. Also ask to see the difference on an actual press sheet between a “four-up and four-out” vs. “four-up and two-out” (for instance) print job. This will be a lot clearer when you can physically see the differences.
Posted in Press Sheet Imposition | 8 Comments »
Sunday, August 21st, 2022
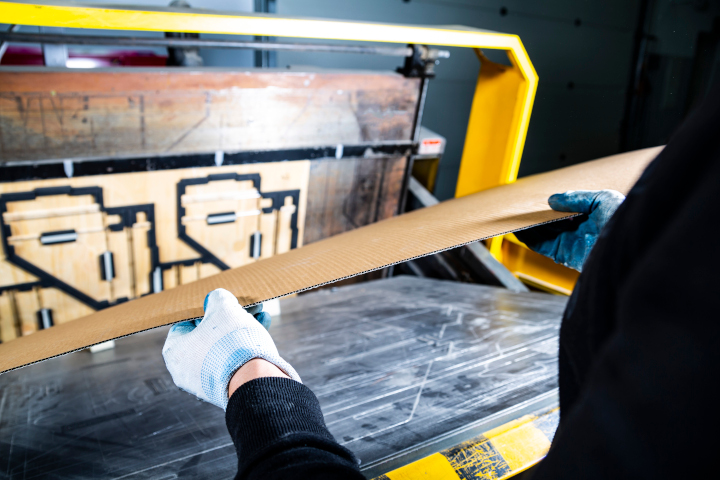
Photo purchased from … www.depositphotos.com
I’ve been writing a lot of blog posts recently about a collection of five forms I had been asked (by a large commercial printing consolidator) to source. As a printing broker, I often have to find commercial printing firms for individuals and business organizations, but this was the first time another printer (especially one so large) had contacted me.
One of the elements of these five forms (almost all of which were either 8.5” x 11” or 8.5” x 14” with a print run every six months of up to 600,000 copies) was 4” x 6” “kiss-cut” labels. The forms themselves were to be produced (printed, perforated in specific places, and/or converted with attached labels and label liner paper). Then all forms would be imprinted (printed again with variable data on Lexmark laser printers). So it was a sweet job—a huge job, with regular reprints.
All of this work involved either die cutting or post-press operations related to die cutting (which include scoring and perforating).
What Is Die Cutting?
First of all, what is die cutting? Die cutting is analogous to cutting out cookie dough with a metal cookie cutter. Using a letterpress (or for longer runs a flexographic press) and metal die rules set into a flat wood base, you stamp out any number of shapes you might choose. (These rules are also heat tempered, so they can withstand the stamping pressure of the letterpress during the cutting.) The photo at the top of this article shows a press operator die cutting cardboard. The shapes on the plywood base are the metal die rules and the rubber supports.
If you take apart an envelope, you will find that the flat blank envelope has an irregular shape. The same is true when you take apart a pocket folder or a small product box like a cosmetics package (until it is completely flat). There are all kinds of tabs and slots, as well as irregular corners.
The three-knife trimmers in a custom printing supplier’s finishing department cannot make these irregular cuts. So you need to first create a metal die cutting apparatus, then die cut your packaging (or whatever other product) blanks, and then finally remove the scrap or waste, leaving the intended shape behind. Only then can you fold, assemble, and glue together the flat sheet into a three-dimensional package (or pocket folder or envelope).
This is the gist of die cutting and assembling a product. The thing to remember is that die cutting is a separate process from commercial printing, so you pay for an additional step. You also need to pay to have the metal die rules fashioned and then set into a flat wood base (a little bit like a flat, thick printing plate with raised areas for the metal cutting rules and rubber pieces to support the paper or cardboard substrate). You (or actually your printer) must also store the cutting die for future reprints. Since this is such specialized work, it is usually subcontracted out, so the die cutting portion of your print job will add to the overall time needed for production.
That said, you can also set up score lines (pressure applied to the paper used to set creases that can facilitate later folding operations) and perforations, and all of these can be done in one pass on the letterpress, saving time and money.
Regarding die making and die cutting prices, in my experience the cost of the metal die has ranged from about $200 to $500 depending on its size and complexity. Since the die can be reused, if you reprint a job regularly you’ll save money. Moreover, if you need to make a standard cut out (let’s say a rectangular window on a card-stock report cover), your printer may already have an appropriate die used for other standard jobs, so you may not need to pay the custom die making cost.
That said, there’s one more thing to consider. If you do too many die cuts on a page you will weaken it. You will notice that even a rectangular window cut out of a 65# cover stock report folder to reveal the first page of the document inside will make the top and sides of the 8.5” x 11” sheet more flimsy than the portion of the cover stock that has not been die cut. So keep this in mind as you determine the size of the die cuts, their complexity, and their position on the final trimmed page.
What Is Kiss Die Cutting (i.e., “Kiss Cutting”)?
To get back to the five subcontracted forms noted above for the commercial printing consolidator’s client, these include a number of elements we just mentioned. First of all the perfs. The perforation rule is set into the wood base at a particular position for a particular length of either horizontal or vertical perforation.
This cuts the paper just like a die rule does; however, the cuts are very small and no scrap or waste is removed. The printing portion of the job precedes this die cutting process.
The final and most complex part of die cutting the commercial printing consolidator’s forms involves the labels. This is why only specialized forms printers replied to my RFQs (request for estimates) for these jobs. The forms printers would need to add adhesive to the back of the 24# bond (or 90# index or 60# cover) base sheets for the forms. Then they would need to attach the thin label liner paper (the slick base paper underneath most labels that protects the label adhesive).
And then they would need to die cut the bond-paper or cover-stock labels without damaging the slick liner sheet behind the 4” x 6” labels. That’s precision. It’s also why these are called “kiss cut” labels. The die cutting has to go through the labels but not through the liner sheet behind them.
Optional Approaches and New Technologies
I know I said early in this article that die cutting is done on a letterpress or flexographic press (i.e., not an offset press), but there is an exception to this rule. A commercial printing supplier can actually attach a perforation rule to a press unit on an offset press and do minor perforations in line with the printing process. However, this will eventually destroy the rubber press blanket (remember that in offset lithography, the printing plate first prints the image to the blanket, and then the blanket prints the image to the paper substrate).
So why would a printer do this? Speed and cost, because for a simple perforation it would eliminate the need to subcontract the perforating step to a letterpress shop.
One final caveat, which is actually a good thing. If your die cutting design is too complex for the traditional die cutting process using metal rules, you may consider laser cutting. I’ve seen snowflakes (or similar lattice work designs) cut out of business cards. There’s no way a metal cutting rule could render this kind of detail. Instead, such intricate work must have been done with a laser.
If this appeals to you, you might want to research Highcon technology. This company manufactures equipment that can do perforations, die cutting, and scoring directly from digital data without the need for metal cutting or scoring rules. Some of this digital technology actually builds up a thickness of polymer (for instance, to make a creasing or scoring rule) using only the digital art files.
The Takeaway
- The most important thing to do if you’re considering a die cut is to plan everything well in advance. Talk to your printer. Specifically ask about the additional time he will need to produce your job.
- Also, ask about using a pre-struck die, a standard die that will save you the cost of preparing a new custom die.
- Ask about ganging up die-cutting, scoring, and perforation tasks for your job to simplify the overall process and reduce costs.
- If you’re doing a perforation, ask about a “wet perf” (the term I learned in the ‘80s for perfs done in line on an offset press). I believe it’s also called a “litho perf.” Doing such a perforation inline on the offset press would only be appropriate for very simple work (nothing intricate).
- Design your die cut with size, location, and complexity in mind to keep costs manageable.
- Ask your printer about some of the new digital cutting, creasing, and scoring technologies. These may actually lower your costs, since you won’t need to pay for metal cutting, perforating, or creasing rules.
Posted in Die cutting | Comments Off on Custom Printing: How Do You Die Cut Something?
Thursday, August 18th, 2022
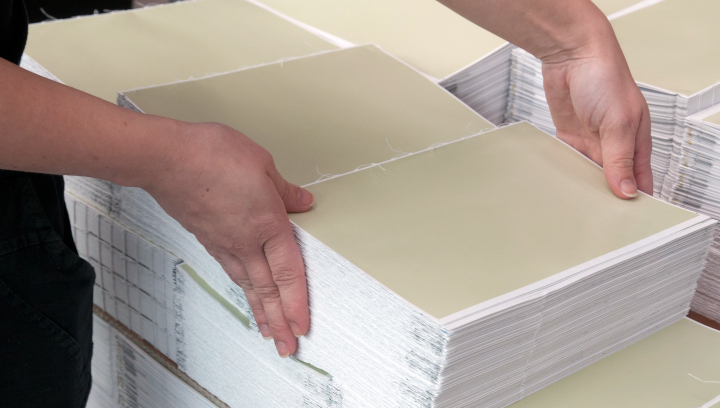
Photo purchased from … www.depositphotos.com
About a month ago I received an email from a rather large commercial printing consolidator. They wanted to subcontract five forms for one of their clients because they themselves could not access the paper they needed for the press runs, some of which reached 600,000 copies every six months. All five forms had perforations. Three had labels with liners. Only one had any printing.
Interestingly enough these forms would be used around the country by some rather prestigious vendors in the beauty/cosmetics industry. As noted above, it was a large recurring job. A sweet deal for a broker.
My prospective client (the commercial printing consolidator) could not do the job on their own in less than 24 weeks because of the difficulty in sourcing paper in the United States. So they asked me to check my sources. As you may know, this request comes in a time of paper scarcity. From vendors I approached from California to the East Coast, I learned that no one had the right paper.
The Context
To put this in context, this is what the 8.5” x 11” and 8.5” x 14” forms were to be printed on:
90# White Index
110# Tag Board
Or 60# – 80# Cover
Once printed, these forms were then to be imprinted with variable data using Lexmark laser printers.
So the client wanted a thicker stock, probably bright-white or solar-white (as opposed to yellow-white or cream) with a hard surface that would support toner application. Moreover, since the Lexmark laser printers would use high heat in their fuser drums to affix the powdered toner to the substrate, the paper had to be uncoated. (Lexmark noted that the cover coating on coated paper could melt in the high heat and foul the laser printer rollers.)
In addition, grain direction would be an issue. (Paper grain had to be parallel to the direction the paper would travel through the laser printers. Or, for very thick paper, the paper grain might have to go the other direction—grain short–to facilitate the bending of the paper as it travels through the printer.) And, paper thickness would be an issue. (According to Lexmark, the paper weight could not exceed 163 gsm, or grams per square meter, which is about 60# cover stock or 110# text stock.)
What Does This Mean?
Basically this is a huge job for a huge printer with a reputation they want to keep. They also want to keep their client (by keeping their client happy). So doing all of this research into the paper is very important. There’s no room for error, such as paper jams in the Lexmark printer due to the size, coating or lack of coating, or thickness of the paper. In fact, all of the printers I approached (about 25) once cut down to a manageable number who could get paper and print and convert the forms (only two), wanted to do a test with the actual paper before the end-user client (the commercial printing consolidator’s client) signed up for even one six-month press run of the five forms.
Paper Specs
At this point, let’s return to the paper specs. The client had requested 90# White Index, 110# Tag Board, or 60# – 80# Cover stock. How could these be even close to the same thickness?
The “basic size” of a sheet of commercial printing paper of “text” weight (used for the interior pages of books) is 25” x 38”. This means that no matter how it is finally trimmed, 500 sheets of 60# text stock at 25” x 38” weigh 60 pounds. In contrast, cover stock is weighed at a different size (the basic size for cover stock is 20” x 26”). Since 500 sheets of 60# cover stock weigh 60#, the reason the cover stock is so thick and the text stock is so thin is that even though the “basis weight” is the same, the “basic size” is different.
And the reason the 90# White Index and 110# Tag Board seem to be of an odd weight is that these are weighed at the following basic sizes:
Tag Board: 24” x 36”
Index: 25 ½” x 30 ½”
Just as an aside, bond and duplicator paper are measured at a basic size of 17” x 22”.
Paper Thickness
Now let’s go back to the specifications Lexmark stipulates for their laser printers. The paper stock used in the laser printers cannot exceed 163 gsm (except, according to some Lexmark literature, for paper used in special paper handling trays, which can be thicker). This 163 gsm stock would be comparable to 60# cover. However, label liner paper will need to be glued to the paper under the 4” x 6” labels that will be a part of the 8.5” x 11” and 8.5” x 14” forms. Therefore, in my mind, it seems that 60# cover might be too thick. Regardless, if the end-user client (the commercial printing consolidator’s client) had specified 60# to 80# cover, anything over the 60# cover stock would be out of the question.
To be honest, I have not yet looked into the thickness of 90# White Index and 110# Tag Board because none of these seem to be available due to the complete scarcity of paper in the United States.
Sourcing Paper
The custom printing consolidator that could not do the job for their client in less than 24 weeks apparently had access to this thicker paper about a month ago. In contrast, none of the 25 suppliers I approached during this past month’s time, apparently, could get this stock.
Given the consistency of the replies I received (one of the vendors even sent me a note from their paper mill noting that anything above 24# bond was out of stock until further notice), presumably the availability of custom printing paper is worsening, and printers are only servicing existing clients.
Options for the Client
One of the two printers in the final cut noted that their pressmen were using 24# bond for similar forms, with great success in imprinting using similar laser printing equipment. These words were poetry to my ears:
- This particular 24# stock was available.
- There was a proven track record for using this particular paper for similar forms-printing work.
I let the commercial printing consolidator know what I had found (along with pricing from the two vendors that could use this paper, do the perfs, create the attached labels, etc.), but unfortunately the end-user client still wanted the thicker paper (Index, Tag Board, or 60# to 80# Cover).
I checked my sources in Canada (as did one of the two printing candidates on my short list of vendors), India, China (through one of the two printing vendors), and South Korea. I had no luck.
We’ll see what happens. After chasing a huge recurring job (for free; brokers don’t make anything until a product is sold) for a month now, I have to wait. Presumably, if all of my sources in the United States are saying the same thing (you can’t buy anything thicker than 24# bond until further notice), the commercial printing consolidator will eventually come to the same realization.
If this were a one-off job, perhaps an odd-lots firm could collect the paper from various suppliers. But for a recurring job with five forms ranging from 120,000 to 600,000 copies, my guess is that everyone, everywhere, is in the same boat. Perhaps the client will accept the 24# stock, for now. We’ll see.
The Takeaway
Even if this goes no further, it has been exciting. It has also provided a lot of object lessons I can share with you, which you may find useful in buying your own commercial printing jobs. Here are some thoughts:
- Find a paper conversion chart online. This is the one I use: http://www.paper-paper.com/weight.html. Such a paper conversion chart compares paper weights for cover stock, text stock, index, tag board, bristol, bond, and a number of other paper classifications and also notes the basic size from which these basis weights have been calculated. With a chart like this, you can see that 20#, 24#, and 28# bond are essentially equivalent in thickness to 50#, 60#, and 70# text stock. This can be incredibly useful information. That said, you should still get printer’s samples and even consider buying a micrometer to measure paper thickness. Why? Because two different paper stocks from different paper mills may be slightly different (even if they are both 60# text or both 60# cover). Also, not all printers can get all possible weights of a particular paper.
- Assume that paper is scarce now and for the foreseeable future. So be open to options. My client’s client, for instance, might not like thin paper forms. I understand that. But thin forms for the present moment may be better than no forms.
- Expect increasingly long lead times to source paper. So even if your paper isn’t completely inaccessible, it still may take some time for your commercial printing supplier to buy it and have it delivered. Therefore, make this assumption when you determine your print schedules, and confirm it with your printers.
- Start collecting paper sample books from your printers, paper merchants, or paper mills. Don’t rely on memory to gauge how thick or thin a particular paper will be. Keep in mind, though, that over time, many paper stocks will go into and out of production. The mills stop making some brands and introduce others. So if you like a certain paper stock and your paper book is out of date, that paper might no longer be available.
Posted in Paper and finishing | Comments Off on Custom Printing: Case Study on Paper Weights, Sizes, and Sourcing
Saturday, August 13th, 2022

Photo purchased from … www.depositphotos.com
Back in the 1990s when I was an art director/production manager, the nonprofit educational foundation for which I worked bought roll labels with a logo, a little bit of type, and room to write participants’ names in magic marker.
If you looked really closely, you could see a slight difference in ink density between the edges of letters or art and the center of the text or image. These were very simple label imprints on matte label stock, so there were no issues with precise halftone details or with tight register of colors. That said, this was a commercial printing technique very different from the offset lithography used for all of the other jobs at my organization. (BTW, we didn’t have digital custom printing yet.) This printing technology was called flexography.
Flexography uses rubber plates wrapped around cylinders (i.e., on a rotary press) to print on any number of substrates. Image areas (type and art) are raised on the rubber plates. That is, this is a relief process unlike offset which uses the immiscibility of oil and water (oil and water repel one another) to allow both image and non image areas of an offset lithographic plate to be on the same flat surface (i.e., planographic rather than relief).
Flexography, then, is akin to letterpress (albeit on a rotary press rather than a flatbed press and using rubber plates rather than metal plates).
What Are the Specific Components of Flexographic Printing?
As with offset lithography, the flexo ink resides in a well on each inking unit of a flexo press. The ink is brought up onto an anilox roller which is covered with wells (like a gravure press cylinder). A doctor blade wipes off any excess ink. This anilox roller then deposits the required amount of ink onto the rubber plate (which is taped to a sleeve on the plate roller). From the rubber plate the ink is applied to the substrate. An impression roller keeps the printing plate tightly pressed against the substrate to maintain precise transfer of the ink from the plate to the substrate.
(Remember that this is in contrast to offset lithography, in which the image is printed on the press blanket first and is then transferred from the blanket to the substrate.)
Each color has its own inking unit. And further along, after the inking units on the press, there are finishing units attached as needed for a seamless custom printing and finishing workflow.
Why Would Someone Choose Flexography?
Multiple Printing Substrates
On an offset press, you can’t print on all possible substrates. In fact, printing on a non-porous substrate would be especially problematic. That said, on a flexographic press, you can use a water-based, quick-drying ink (dried with heat), and this allows you to print on plastic sheeting (to wrap bags of bread for the grocery store), wallpaper, paper cups, foil, cellophane, fabric, plastics, metallic labels, envelopes, milk and cereal boxes, shopping bags, corrugated board, and wrapping paper, to name a few substrates. A lot of companies even use flexography for newspaper printing.
A Variety of Appropriate Inks
On a flexographic press, you can use water-based inks as noted above, but you can also use solvent-based inks (as you do in offset lithography). Plus you can use UV inks (cured with UV light rather than heat). So you have more ink options than you do with offset lithography.
In addition, with flexography, you may have multiple ink stations (more than the four in offset lithography for cyan, magenta, yellow, and black), so you can more easily add PMS colors to the job. (Granted, six- and eight-unit offset presses can do the same thing.)
And flexo inks are not as viscous as offset commercial printing inks. Therefore they will dry more quickly.
Also, in offset lithographic commercial printing, the process colors are transparent. You create different colors by overlaying various halftone percentages of each of the four process colors. In flexography, however, the inks are more opaque. In fact, you can even approach the thickness of ink achievable with custom screen printing when you’re using a flexographic press.
So overall, ink flexibility is a major plus of flexography.
Long-Lasting Printing Plates
Even though they are made out of rubber (a photopolymer compound, actually, that can be imaged with a laser and then processed with a solvent to remove excess rubber from the non-image areas), flexographic plates can last a long time, up to several million impressions, which is a lot longer than the life of many metal offset printing plates. This will save you money in platemaking.
The Speed of Flexography
Once up to speed, flexo printing can be faster than offset lithography.
Inline Finishing Options
For the most part, if you were producing a job via offset lithography, you would complete the printing process and then bring the press sheets into the finishing department for further work. However, with flexography, you can set up finishing operations such as laminating, slitting, trimming, and die cutting inline with the custom printing. This will make the overall manufacturing process take less time, which will translate into dollars saved.
Detail, Precision, and Resolution
Back when I was an art director in the 1990s, flexography was not the most precise commercial printing technology. Since the plates were rubber, and since this was essentially a “stamping” operation, the flexo plates moved around slightly. This meant registering one color to another precisely was not always possible, and it also meant that dot gain would be higher than with offset lithography (halftone dots would spread and print darker, or actually larger, than intended).
However, based on all my reading for this article, it seems that precision within the realm of flexography has improved considerably in the last thirty or so years. Presumably this allows for finer halftone screens, tighter register, and less dot gain than before.
In addition, there has been increasing automation within the printing industry (including flexography). For instance, if you look at the bottom of a cardboard orange juice container printed via flexography, you will see printed targets that allow for closed-loop electric-eye monitoring of (as well as computer control over) color accuracy and tight register on press.
The Takeaway
That said, if you are considering flexography for one of your commercial printing jobs, I’d encourage you to review printed samples first to make sure that the resolution of images, register of color plates, and evenness of ink application are suitable for the product you are printing. If they are, flexography can be a highly economical option.
Posted in Flexography | Comments Off on Commercial Printing: Choosing Flexography as a Print Option
Tuesday, August 9th, 2022
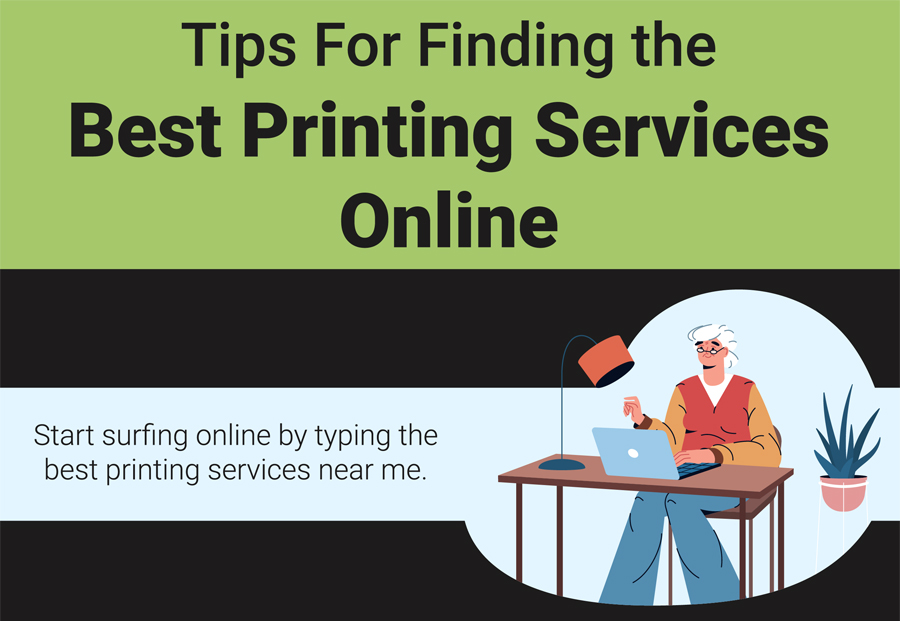
Have you been looking out for the best printing services in town? Well, one of the best ways to find the right printing company for your business is by researching online. If you follow the process given below in the infographic, we are sure you will find the best online printing service in no time. So, without wasting any more time, let’s get to it! (more…)
Posted in Infographics | Comments Off on Tips For Finding the Best Printing Services Online
Sunday, August 7th, 2022

Photo purchased from … www.depositphotos.com
Since Mother’s Day is coming up, my fiancee and I recently stopped at the grocery store to look for Mother’s Day cards. We have a number of mothers in the family and don’t want to leave anyone out. (more…)
Posted in Bag Printing | Comments Off on Commercial Printing: Thoughts on High-end Shopping Bags
Tuesday, August 2nd, 2022
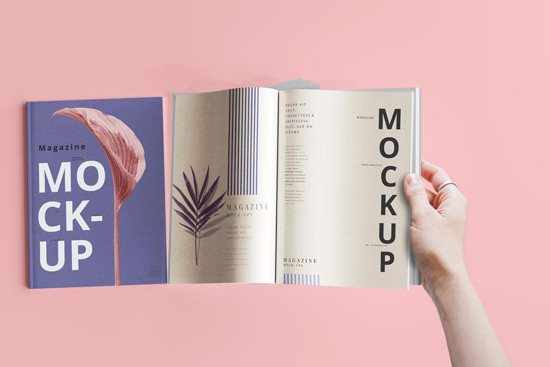
Do you have magazine printing queries on your mind? It’s good to have questions – after all it’s an innovative process. You might be having questions regarding the cost, benefits, and whether magazine printing services create value. (more…)
Posted in Printing | Comments Off on Choosing the Right Magazine Printer: 6 Tips for Success
Monday, August 1st, 2022
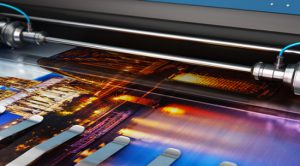
Photo purchased from … www.depositphotos.com
About twenty years ago I brokered five catalogs to a Canadian printer. I actually found the printer through the Printing Industry Exchange (true story, not a plug for PIE), and I kept the gig going for a number of years. Everything went well. I was pleased. My client was pleased. (more…)
Posted in PrintBuying | Comments Off on Custom Printing: Considering Buying Printing Overseas
|
|