Printing Industry Exchange (printindustry.com) is pleased to have Steven Waxman writing and managing the Printing Industry Blog. As a printing consultant, Steven teaches corporations how to save money buying printing, brokers printing services, and teaches prepress techniques. Steven has been in the printing industry for thirty-three years working as a writer, editor, print buyer, photographer, graphic designer, art director, and production manager.
|
Need a Printing Quote from multiple printers? click here.
Are you a Printing Company interested in joining our service? click here. |
The Printing Industry Exchange (PIE) staff are experienced individuals within the printing industry that are dedicated to helping and maintaining a high standard of ethics in this business. We are a privately owned company with principals in the business having a combined total of 103 years experience in the printing industry.
PIE's staff is here to help the print buyer find competitive pricing and the right printer to do their job, and also to help the printing companies increase their revenues by providing numerous leads they can quote on and potentially get new business.
This is a free service to the print buyer. All you do is find the appropriate bid request form, fill it out, and it is emailed out to the printing companies who do that type of printing work. The printers best qualified to do your job, will email you pricing and if you decide to print your job through one of these print vendors, you contact them directly.
We have kept the PIE system simple -- we get a monthly fee from the commercial printers who belong to our service. Once the bid request is submitted, all interactions are between the print buyers and the printers.
We are here to help, you can contact us by email at info@printindustry.com.
|
|
Archive for the ‘Printing’ Category
Sunday, December 3rd, 2023
Photo purchased from … www.depositphotos.com
The Printing Industry Exchange Blog is #12 of the best 40 digital printing blogs, as selected by FEEDSPOT.
When you design a print product and/or buy commercial printing services, sometimes problems arise. Printing is a complex process not only in terms of logistics but also in terms of design issues and art file preparation issues.
The very best way to avoid errors is twofold:
- Put everything in writing. Craft an ongoing specification sheet, which you can then alter for each job, or kind of job, as needed. You can start by closely reading a number of printer’s bids. These will give you ideas, which you can expand upon over time. I’ve been changing and updating my base spec sheet for over 40 years. The more I learn about commercial printing, the more I tweak this document. And each time a totally new kind of work comes up (like a sample case for pieces of flooring, for which I brokered custom printing services a few years ago), I add even more specifications and/or massage the ones already there. This document is the main communications device between you and your printer, addressing everything from design specifications to file preparation to printing, binding, and delivery.
- Proof early and often (to misquote the mid-19th century political saying). Back in the day (the ‘80s and ‘90s), our proofs weren’t as comprehensive as now. Make sure you see as many proofs as you need to at the highest level of detail you can, showing all color, all images (pretty much all of this is commonplace now). But review them closely during the printing process. Don’t edit copy at this stage, but do have relevant decision-makers in your office review them, too. Proofing is an investment, not an expense.
Client Errors: My Own Biggest Error and and a Colleague’s Error
Either you created the problem or the printer did. Those are the two options. That said, some flaws are just embarrassing, while others make a project unusable. It’s important to make an honest assessment. Here’s a mistake I made early in my career as the art director/production manager for a nonprofit government education organization.
I had designed a poster (approximately 3-feet wide by 4-feet tall) with an image of the Capitol as the background. I had positioned around the Capitol dome a number of illustrations of students drawn by a famous cartoonist that worked with my organization. I left it to the printer to do all of the photo compositing work. But the problem was that I had started with a 35mm slide of the Capitol. Back then, since we didn’t scan our own images, we didn’t see the enlarged film grain (silver halide, the old process prior to digital). We only saw this patterning of the film grain (and somewhat soft focus) at the proof stage. I had enlarged the image, which already had a lot of grain (since it was an especially fast, or light sensitive, film). At the very least I should have used an 8” x 10” press-camera image or (if that had not been an option) a 2 ¼” square-format image. (We didn’t have digital images back then.) The larger-sized negative would have been more detailed at that size with more gradations of color and less film grain. Therefore it would have yielded a better print.
What We Can Learn
I made the mistake. Because we saw the problem at the proof stage, we didn’t have to make the decision whether to reprint or live with this. We decided to embrace the patterning and call it a mezzotint. But I learned something.
So in the case of your own design and print buying, if you need a huge photo, buy the reprint rights to one and make sure it’s huge. Never enlarge a photo. You’ll see grain patterning (if it’s a silver halide print) or pixelation (if it’s a digital image). You can get these images online (we didn’t have that option back in the ‘80s and ‘90s).
Fortunately, now all images will have been incorporated into your design file before you send it to the printer, so check the color, resolution, placement, cropping, etc., of all images and then request a “contract-quality” proof from the printer.
All of these steps should ensure your success. But remember, never enlarge. Only reduce.
One other thing to remember is that if you do need to reprint a job due to an error (one of my print brokering clients had to do this a few years ago due to problems with her color choices and positioning of solid inks), your printer may only charge you his cost (without his added profit percentage). This may be negotiable. It doesn’t hurt to ask, and that can make a difference.
Printer’s Errors
When I was an art director, a commercial printing vendor “flopped” a photo. That means that when he stripped the photo negative into the composite negative from which the plates were made, it was “wrong reading” rather than “right reading.” I asked for a reprint for the following reason. The image included the organization’s logo prominently displayed (on a podium sign, so it was very visible). And it was backwards. Since it had been correct on the blueline proof and then had been changed (in error) between this proof stage and the final printed piece, it was the printer’s fault. He had to pay for the reprint.
I also made the printer reprint the CEO’s letterhead after it arrived with the two colors of the logo out of register. Unfortunately, even though these two jobs were worthy of reprinting at the printer’s cost, our organization did get a bit of a reputation in the local pool of custom printing suppliers as being a problem client. That’s why I’d encourage you to use discernment and honesty when you decide whether a printing flaw is annoying or whether it renders the job unusable.
Another job doesn’t really highlight an error but rather a potential risk of an error. A local magazine wanted to print an invitation for a special event. I suggested seed paper (they could actually plant the printed invitations, and flowers would grow from the seeds in the paper). I contracted with a printer on the East Coast, and then I bought the seed paper from a vendor in the Midwest and had it shipped to the printer. Unfortunately, many of the sheets of seed paper jammed the East Coast printer’s digital press. (They were not of equal thickness across the entire sheet.) Due to the excessive spoilage, the printer almost didn’t have enough paper for the job.
If I had this to do over, I would have had the printer buy the paper rather than buying it for him. He would have known exactly what to buy and how much. Fortunately, this was a problem that didn’t quite happen, but it almost did, and it would have been bad. Best to learn from it.
The third example had to do with a small-format perfect-bound book of flower photos. Each page spread had a flower on the left and a pithy quote about life on the right. It was intended to make you think about the simple joys and beauty of life.
The background of the front cover, back cover, and spine was a black solid with heavy ink coverage. Over this black ink, the printer added a dull film laminate. Unfortunately, the black solid ink was not completely dry when the printer added the laminate. Therefore the ink produced a gas as the liquid ink vehicle evaporated, and the gas made the cover coating bubble. None of the books were usable.
The vendor stepped up. He took off the covers and reprinted them, and re-applied them to all the text blocks once the ink had dried and the covers had been laminated. Then he trimmed the books a second time. Fortunately, I had left a little wiggle room around all art elements close to the exterior cover trim. So what might have gone from “close to the trim” to “painfully close to the trim” didn’t occur.
So in your own design and print buying work, always, always, always remember that replacing print book covers renders the overall book smaller than you had planned. Therefore, keep all live-matter type and imagery away from folds and the trim.
What We Can Learn
The first scenario (with the flopped photo) should never happen again, given the fact that you, as a designer, will always either buy or scan the images yourself. That said, if anything ever goes wrong between the printer’s contract proof and the final job, you have proof that it was the printer’s responsibility.
The second scenario pertains to color register. If colors are out of register, that is a printing flaw. Your printer should look for this during the press run. That said, some problem press sheets may slip through, so be aware. Colors out of register can also create color shifts within photos, especially in neutral colors.
The third scenario with the book covers provides several life lessons.
As noted above, keep wide margins–even if you never have to replace print book covers in the course of your career. This includes—especially–where you position the page numbers (folios). They can also become “too close for comfort” in saddle-stitched print books with longer page counts. Pages close to the center of the book will be pushed out slightly from the bind edge, and folios close to the center spread can get too close to the trim or be trimmed off entirely.
Work with vendors who will take responsibility for their actions. If the error is truly theirs, they will acknowledge this and give you some options. (For instance, the printer only reprinted and reattached the covers because there was nothing wrong with the text blocks. There was no reason to reprint the entire job. I continued to work with this printer for many years thereafter.)
Assume there might be problems with drying and coating operations when you’re printing heavy-coverage inks. You may want to ask the printer about this.
The Takeaway
I have made my share of errors. I lived through them. I also learned from them and never made them again. Fortunately graphic art file preparation in 2023 gives you more control than I had in the 1980s and 1990s because you can see the complete pages on your computer, your inkjet printer, and your printer’s “contract proof.” You can usually see the errors before they happen. That’s a blessing.
Always seek to develop mutually beneficial, long-term relationships with printers. Price should only be one component of your decision to go with a specific vendor.
If problems do occur, try to work with the printer dispassionately to find a solution. It’s human nature to want to lay blame, but it doesn’t solve your problem. Maybe you need a reprint. Maybe you only need a discount.
Posted in Printing | Comments Off on Custom Printing: Printing Problems, Problems, Problems
Monday, November 20th, 2023
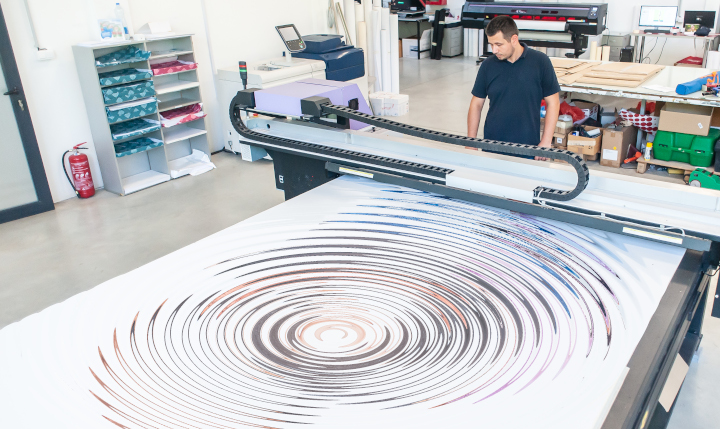
Photo purchased from … www.depositphotos.com
The Printing Industry Exchange Blog is #12 of the best 40 digital printing blogs, as selected by FEEDSPOT.
How did they do that?
At our favorite thrift store my fiancee and I found a print of a beach scene printed on wood. The yellowish cast of the wood created an overall tone and feel of sand, and the swirls in the wood grain made it look like the wind had created dunes. The beach umbrella and empty chair (presumably the owner was in the surf) added to the overall ambiance. Don’t you wish you were there? I did.
Since I am a commercial printing nerd, my mind clicked on a few spaces, wondering how the artwork had been printed. I also thought about the options for printing on metal and glass, and even printing on irregular items like drinking glasses.
Printing on Wood
So I went to school on the subject. Apparently you can run a door, or any other large, flat piece of wood, through a flatbed inkjet printer. Such a printer differs from your inkjet printer at home in that it is huge, and it will accept “rigid media.” This is also different from the roll-fed inkjet printers used to produce full-size vinyl banners or component parts for even larger banners that are then sewn together.
UV flatbed inkjet printers are ideal for printing on wood, since UV radiation (i.e., light) cures the ink instantly on the surface of the wood.
I have also seen other wood items that have been printed and then coated with layers of flood varnish (or some other durable coating). This would be a step ahead of decoupage (laying a printed image on a box or table and then coating it with multiple layers of varnish to make the image essentially a part of the substrate). I would think printed surfboards were produced this way before the advent of digital commercial printing.
Such “print-on-wood” technology is also useful for imaging floorboards digitally. The things to keep in mind are the kind of ink you’ll be using, whether it will adhere firmly to the substrate, and how durable it will be, depending on its intended use. (For instance, printed floorboards need to be more abrasion resistant than wall panels.)
Printing on vinyl and then adhering the image to wood is a second option. And a third option would be custom screen printing, another ideal choice given the thickness of the ink.
Clearly this opens up possibilities not only for surfboards but also for all manner of interior design items.
Printing on Glass
Glass an interesting substrate. You can actually tint glass used in the exterior walls of buildings in such a manner that you can control the interior temperature to a good extent, depending on how the coloration affects the absorption or reflection of heat from the sun. Intelligent use of this capability can reduce air conditioning costs dramatically.
According to my research there are currently two main ways to image glass: custom screen printing and custom printing with ceramic glass inks. The former will not be as durable, since the screen printing inks will sit up on the surface of the glass completely. There will be no absorption into the substrate that might allow for a good bond.
On the other hand, ceramic glass printing actually makes the pigment a part of the glass, significantly increasing its durability. In this case the pigment (heat resistant enamel) is applied to the surface of the glass prior to its being tempered. The heat-based tempering process then fuses the pigment to the glass and strengthens the glass against breakage at the same time.
Granted, these options address issues of interior design and architecture, whereas it is also possible to print on drinking glasses, presumably also with these two kinds of ink. The custom screen printing ink (or digital UV ink) sits up on the surface of the glass, whereas the enamel ceramic ink would be fused to the glass.
In terms of logistics, the option of screen printing, for instance, would involve the glass’ being rolled around its center axis while the flat screen-printing apparatus above the glass allows the ink to pass through the open areas of the stencil and onto the glass.
The UV digital imaging option would involve digitally printing onto the glass, again with an ink cured by UV light, but this would also not be as durable as pigments that can tolerate the high heat of a kiln (ceramic glass inks), which would provide more durability. Presumably you can also decorate drinking glasses with printed appliques.
Understandably enough, since glass is an extremely flat, non-porous substrate, getting the ink to adhere is a challenge. In my research I learned about such products as Pyrosil and Pyrotrack, which promote adhesion. (Essentially, these adhere to the glass to strengthen the bond between the glass and the printing ink.)
Printing on Metal
I’ve seen a lot of photos printed on metal at street fairs and craft fairs. The background substrate gives a sheen to the entire print. But how do you do it? How do you print on metal?
Metal is like glass in that the substrate is exceptionally flat and also non-porous, so adhesion of the ink to the substrate is challenging.
In the past, custom screen printing and then digital inkjet printing would have been the methods of choice. In my research I learned that for the most part, digital printing is used to print photos on aluminum for display. Presumably this would be adequate, since the photo print would be hung on a wall (in contrast to something printed on floorboards or a flat metal floor). Also, presumably, using UV-cured inkjet inks would improve the durability of the inks and their ability to adhere to a non-porous surface.
That said, the new way to print on metal is via dye sublimation, which has a number of benefits.
First of all, as with dye-sub printing on polyester fabric, dye-sub printing on metal is usually done by inkjetting special sublimation inks onto a transfer sheet. This is placed against the metal substrate, and a heat press turns the solid inks directly into gas (i.e., sublimation means changing the physical state of the ink from solid directly to gas without the interim liquid state). The high heat fuses the image to the metal (as it also does with ceramic mugs and other rigid substrates–i.e., items other than fabric).
The good news is that once the image has been sublimated, it is resistant to the elements (heat and cold) as well as rub resistant and chemical resistant. The images are also resistant to UV light (i.e., exposure to sunlight), and they won’t bubble, or flake or peel off the substrate—essentially because the heat of the sublimation process has made the image part of the metal.
The one thing to keep in mind is that dye-sub printing needs a polyester base, so the metal must be coated with polyester (just like the garments used in dye-sublimation fabric printing).
The Takeaway
If you design promotional items, such as branded drinking glasses, or even glass, wood, or metal materials used for architectural structures, it would be prudent to learn about all the options you have for imaging onto these substrates.
From my research it seems that the main issues will be the adhesion of the ink to the substrate and its subsequent durability. But it also seems that you have multiple options, ranging from custom screen printing to digital printing (both inkjet and dye sublimation). Any process that fuses the image to the substrate will last a lot longer than a process that only deposits ink on the surface of the material. That said, it seems that UV digital printing is still a good (but somewhat less durable) option. In this case you at least have the ability to cure the ink instantly, which will allow it to sit up on the surface of (and adhere to) a non-porous surface like glass.
In all cases, however, it’s smart to look for skilled professionals well versed in custom printing on the substrate of choice, whether glass, wood, or metal, and to ask questions about such things as chemical resistance, peeling, flaking, and rub resistance. Make sure you vet the printer to ensure that the printed product looks as good in a few years as it did when it was delivered.
Posted in Printing | 2 Comments »
Sunday, October 8th, 2023

Photo purchased from … www.depositphotos.com
The Printing Industry Exchange Blog is #12 of the best 40 digital printing blogs, as selected by FEEDSPOT.
Halloween is almost two months away. That’s not too soon to start planning.
If you look at the photo above, you can learn a lot about Halloween. First of all, in this country we have pumpkins we carve into Jack-O’-Lanterns. This is a lot easier than in past centuries (in Europe), when people carved faces into turnips and set lit candles into them. A turnip is smaller than a pumpkin, and the flesh of a turnip is much harder to carve.
On a spiritual note, Halloween was the Celtic New Year, when the veil between the world of the living and the land of the dead was thin and permeable, and people (i.e., souls) could travel in both directions between the worlds.
The other elements in the photo above are the painted skull and the marigolds, both of which represent the Day of the Dead (Dio de los Muertos) in countries like Mexico. This holiday celebrates those who have passed on. People dress up, paint their faces (often like the skull in the photo), and leave marigolds and offerings of food at gravesites of their loved ones.
So How Does This Pertain to Commercial Printing?
It’s relevant in at least five ways. For me, these come to mind immediately.
- The technology of 3D custom printing is well suited to the little items we associate with Halloween, particularly since most of the items are fanciful. (It’s much easier to 3D-print a goblin than to either find a live one or carve one out of plastic or wood. Or, you could potentially 3D print a Hand of Glory–Main de Gloire–out of wax and use it as a candle that will supposedly make you invisible.)
- It is also possible to laser-print words and images onto waterslide decals and then wet them and slip the images off onto ceramic items. Then when you fire the items in a kiln, the high heat will allow the glaze to soften and the iron in the laser toner particles to become embedded in the glaze.
- Custom screen printing would also be an option. In this technique you would force thick ink through a mesh screen with a squeegee. First you would attach a stencil to the screen, and when the ink is drawn down the length of the screen with the squeegee, the solid areas of the stencil would block the ink while the open areas of the stencil would allow the ink to flow through. This is especially good for custom screen printing Halloween t-shirts.
- Digital commercial printing is another option–specifically inkjet. These days “direct-to-shape” (DTS) printing is in vogue, so if you have a 3D object you want to decorate, you may be able to find a vendor with direct-to-shape printing capabilities. Perhaps you have a foam rubber pumpkin you want to decorate. If the product can fit in a direct-to-shape printing enclosure, you may be able to decorate it directly with the inkjet press. This works because the jets of the inkjet press never actually touch the substrate. Instead they are suspended above and moved around irregularly shaped objects.
- Pad printing is still another option. This is a technique in which a little rubber bulb is pressed against an inked custom printing plate, where it picks up the image. The pad is then moved into place over the substrate. When the pad is pressed against the substrate (in this case perhaps a Halloween golf ball with a printed image of a ghost), the image is transferred to the new object. (Usually all of this takes place in a coordinated fashion, mechanically, on a pad press. It is an ideal commercial printing method for objects with irregular surfaces like golf balls.)
Some Examples: 3D Printing in Plastic
Let’s address a few of these custom printing technologies individually and in more depth, and maybe identify some Halloween items for which they would be ideal.
First, let’s discuss 3D printing, since you can find these printers at a reasonable price point now in big-box computer stores. In my mind, 3D printing is similar to a souped-up version of inkjet printing. Plastic filament from a spool is melted and then jetted through a print nozzle, producing layer upon layer of the plastic to build up a physical product that has length, width, and height (in contrast to a 2D inkjet printer, which creates an image with length and width only). Once the melted plastic filament hardens again, you have a physical object.
When I Googled “3D Halloween,” I found images of pumpkins with all kinds of detailed expressions. You would still have to paint the items, since the filament that I’ve seen prints in only one color. Plus, the extrusion jet only prints layers, not specific items. But you can capture detail that would not be feasible in any other method. So this lends itself to things like jewelry (perhaps ghoolish earrings for the witch in the family).
I was also struck by images of Jack-O’-Lanterns that were not only intricate but hollow, with openings for eyes and a mouth that led to the interior reaches of the Jack-O’-Lantern. When you remember that these 3D items are produced from digital CAD-CAM data and extruded layer by layer, you can imagine how much detail can be included for both the exterior and interior of a 3D printed item.
That said, I do believe that some filing and cutting away of any imperfections may need to be done in some cases, but presumably much less than for removing excess plastic from around the seams of injection-molded plastic items.
I also found 3D printed ghosts, spiders, and monsters. In all cases, it was the level of detail that intrigued me.
More Examples: Ceramic Printing
My fiancee has three items that exemplify custom printing on ceramics: two palmistry hands with alchemical and astrological symbols and one phrenology head. (The phrenology head notes which parts of the person’s cranium pertain to various characteristics and life events, in such a manner that you can presumably tell fortunes based on the bumps on her or his head.)
In all cases these are black markings (no color involved) on gloss, glazed ceramic.
Usually, one could decorate these palmistry hands and phrenology head with ceramic glazes containing heat-resistant minerals that would give a specific color to the ceramic base product. These could even be added to the ceramic piece (as noted before) using waterslide decals, if you did not want to paint the design directly onto the ceramic item.
With waterslide decals, you image the decal in a “backwards,” or wrong-reading, orientation. Then you wet the decal, which will make it curl. If you wait a little while, the decal will flatten again, and you can place it against the item you wish to print (such as my fiancee’s palmistry hands). If you then slip away the waterslide backing, you will leave the printing on the base ceramic piece (such as all the symbols for the planets printed on my fiancee’s palmistry hands). Since this mineral glaze is heat resistant, it will stay in place in the high heat of the ceramic kiln, and the mineral will fuse with the glaze already on the ceramic hand.
A similar approach involves using a laser printer. One of my fiancee’s ceramic palmistry hands appears to have halftone dots comparable to laser-printing output. Apparently, since toner particles include iron, the high heat of a ceramic kiln will only burn away the plastic and binders in the toner powder leaving the iron toner particles in place. The benefit of this particular method is that you can get the precision available with laser printing.
So for printing text on a phrenology head or symbols of the planets on a palmistry hand, it can be far easier to laser print on the decal, and then transfer the image to the ceramic substrate, rather than paint all the letters in a colored glaze by hand.
And the process works better with a glossy (rather than matte or dull) glaze, since the heated gloss glaze in the kiln absorbs the toner particles, whereas the toner particles only sit up on top of a matte or dull glaze. This makes the bond with the gloss coating more durable (rub-resistant).
My fiancee also has a multimedia piece with a printed background (a 3D hand decorated with alchemical symbols and set within a “shadow-box” Halloween-imaged background). First the background was printed on paper using offset lithography (I can see the halftone dots) and then glued to the inside of an open wood box. Then a cast-plastic palmistry hand painted with astrological symbols was set within the shadow-box frame. (I say hand-painted because the ink or paint is thick, like screen printing ink, and because there are no halftone dots, as there would be with a laser-printed image.)
You may want to Google this waterslide decal process, which allows you to laser print an image (backwards) on plastic, slip the wet image onto a ceramic piece, and then kiln-fire the item to make the image and text a permanent part of the surface glaze.
Posted in Printing | Comments Off on Custom Printing: Get a Jump on Printed Halloween Swag—Boo!
Monday, September 25th, 2023
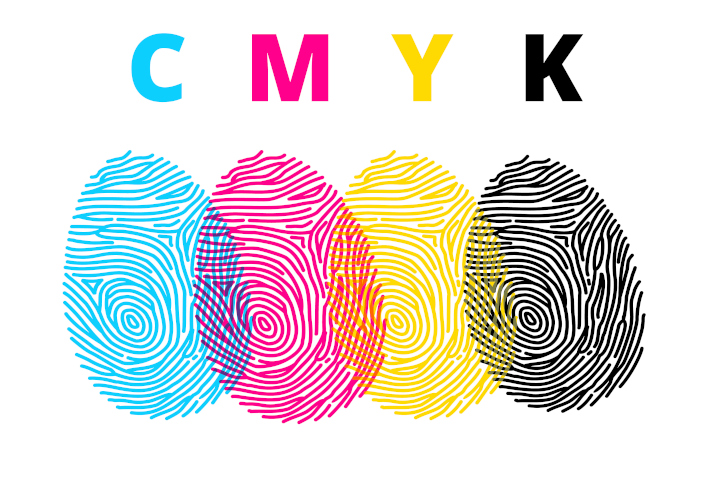
Photo purchased from … www.depositphotos.com
The Printing Industry Exchange Blog is #12 of the best 40 digital printing blogs, as selected by FEEDSPOT.
For a number of years I’ve been seeing online (web-to-print) offers in which you can print your photograph or artwork onto metal. This is based on inkjet printing. It also takes advantage of the reflective nature of metal to enhance the appearance of your photo or art, to brighten it, and to give it an otherworldly sheen.
I find this interesting because it calls to mind a number of other approaches I have seen over the years to enlarge the number of distinct, printable colors available with a particular commercial printing technology.
The Hexachrome Process
About thirty years ago one of the commercial printing vendors I worked with (I was an art director/production manager for a non-profit government education foundation at the time) had installed two technologies relevant to this discussion: Hexachrome custom printing and the substitution of CMYK inks with anywhere from one to four fluorescent inks.
All of this was based on the limits of offset lithography. CMYK inks (cyan, magenta, yellow, and black) combine to create only a limited portion of the visible light spectrum. This is called the “color gamut.” Visible light (what you see outside in the sun) provides the widest color gamut of distinct colors. RGB (red, green, blue) phosphors that create color on a computer monitor or television screen produce a smaller color gamut. And the smallest color gamut is created with ink, paint, or toners (i.e., CMYK pigment on a substrate).
These colors (in the case of offset lithography) are transparent inks (usually printed in halftone dot patterns laid over one another and then slightly angled to keep dots of the four process colors from producing visible moire patterns). The percentages of these colors (as reflected in the size of the halftone dots) when seen together create the impression of color in the eye and brain of the beholder.
Because the offset lithographic color gamut is smaller than that of a monitor (or the visible light spectrum outdoors), it has been a goal over the years to find ways to expand the color range. Back when I was working with the aforementioned printer delving into Hexachrome color and replacement of certain process colors with fluorescent inks, this was how they attempted to extend the color gamut.
Hexachrome added orange and green to the normal cyan, magenta, yellow, and black inks. More specifically, when separating a photograph (for instance) into the usual four printing plates needed for process color printing, this commercial printing supplier would actually separate the photos into six halftone images. Doing so would add two of the secondary colors (orange and green) into the mix and therefore enhance anything containing these two non-CMYK hues, producing (for instance) vibrant blues and purples when combined with the CMYK inks.
You may want to compare this offset lithographic custom printing technique to today’s large-format digital inkjet printing technology, in which multiple inks (such as the usual cyan, magenta, yellow, and black, along with light cyan, light magenta, and sometimes red, green, blue, orange, and violet—or any combination thereof–for up to about ten or twelve inks) expand the inkjet color gamut beyond that of traditional offset lithography.
Touch Plates, Bump Plates, and Kiss Plates
Two things to remember when using commercial printing techniques with an expanded inkset are that you need more than four inking units on your offset press (so the price-per-hour to run a larger press, like an eight-color press, will rise beyond that of a four- or six-color press) and you can’t accurately proof such a job using traditional four-color proofing devices.
That said, and in spite of the fact that Hexachrome has not been a familiar name (to me at least) since I saw it in the 1990s, printers will add colors to your process ink work if you ask them to do so. These colors (with one plate for each additional color) have been referred to as “touch plates,” “kiss plates,” and “bump plates” because they bump up an otherwise subdued or non-reproducible hue. They also increase color saturation and contrast, so the effect can be quite attractive, and can in fact make a particular part of an image (like a child’s red wagon) really jump off the page.
To do this kind of work requires a skilled prepress operator, because you don’t want the transition between the additional color and the surrounding colors to stand out in too stark a manner. You don’t want obvious edges.
White and Silver Ink
The same approach needs to be taken to the underprinting of white or silver ink.
If you are printing on an uncoated, tinted sheet (let’s say a cream stock, for instance), the normal process colors will do two things. They will seep into the paper fibers, which will dull down the color, and (since they are transparent) the process color hues will be changed to a certain extent by the color of the paper substrate.
Printing a white background (graduated intelligently to avoid a “cut-out” appearance) will improve the color fidelity of the overprinted inks (they won’t shift due to the color of the underlying paper), or if you are printing a photo of jewelry, for instance, you can give a metallic sheen to the printed image by using silver ink rather than white ink for the underprinting.
Again, keep in mind that the background needs to be sensitively created with a wide range of tones (light to dark) to make it look like part of the overall color image.
Fluorescent Inks
A similar approach to adding silver or white ink to an offset printed job is to replace one or more of the four process colors with fluorescent inks.
The same printer I referenced earlier that was experimenting with the Hexachrome process (a Pantone, Inc., invention, by the way) made its own set of process colors with the same goal in mind: to augment the printable color spectrum. In this case, this printer would add fluorescent inks (anywhere from one to four fluorescent replacements for the CMYK colors, depending on the result the printer wanted to achieve).
That said, it is possible to replace a process color with just a more intense version of the same process ink rather than an actual fluorescent ink. But in either case, it is important to note that changing the color of one process ink will affect everything in the job—all photos, colored type, and solids and tints—and this may adversely affect such things as skin tones, creating an otherworldly effect. This can be made even more problematic given the difficulty in accurately proofing such ink substitutions.
The Takeaway
That said, you may have more options than you had thought for your commercial printing jobs if you’re willing to experiment with the inks. When I was an art director there were sample books you could get from printers and paper merchants showing the specific kinds of effects possible with metallic inks or fluorescent inks. These included color images printed on different kinds of paper (uncoated vs. coated, for instance, or different colored hues of paper).
Assuming you can still get these sample print books, I’d encourage you to do so in order to show your print provider the exact effect you want to achieve. And don’t assume all printers will be equally skilled in custom printing fluorescent and metallic inks. Ask your printer for samples of work he has actually produced as well as paper and ink sample books.
Posted in Printing | Comments Off on Commercial Printing: Expanding the Color Gamut
Sunday, September 3rd, 2023
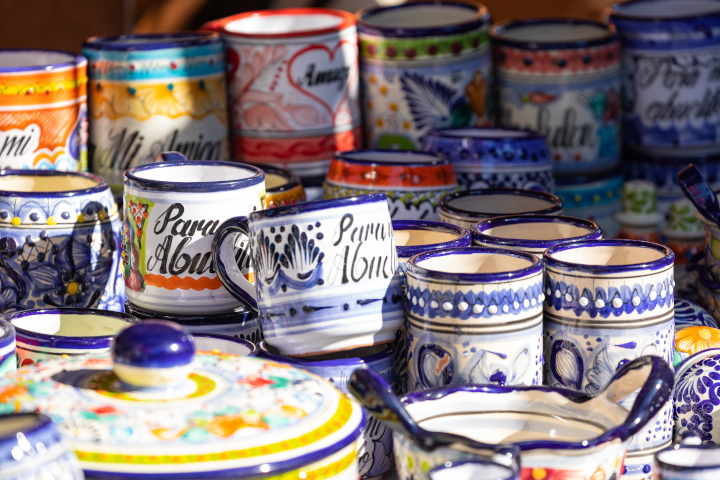
Photo purchased from … www.depositphotos.com
The Printing Industry Exchange Blog is #12 of the best 40 digital printing blogs, as selected by FEEDSPOT.
During our numerous visits to thrift stores over the years, my fiancee has bought a plethora of objects with words printed on them. She is a sculptor (that’s one of the skills she brings to our art therapy work), so printed, 3-dimensional objects of interest to her include everything from furniture to vases to giant clocks, even words printed on bottles. (She loves advertising art and found objects.) The list goes on.
Now to me, as a student of commercial printing, this is of interest because I can see how printers print on substrates other than paper. In fact, the first thing I often do when we get home with a new thrift-store purchase is to take out my 12-power printer’s loupe and analyze the print job closely, considering both the aesthetic effects and the technical elements of the print job.
The other thing that interests me is the different cognitive experience of seeing a printed cabinet, for instance, with type rather than a picture or other image printed on it. What little I know about the brain from studying both graphic art (as well as commercial printing) and the fine arts (painting, drawing) has made me conscious of the different parts of the brain involved in seeing and responding to words vs. pictures.
The Furniture
Most of our furniture with words as opposed to pictures printed on it is in the realm of cabinetry. Both pieces that come to mind as good examples seem to have been printed using stencils. If you think back to World War II and the ammunition boxes (which my fiancee also has) stenciled with various letters and numbers, stenciling starts with images, patterns, or letters cut out of a background.
When you place these stencils on the furniture and then paint over the open areas with paint and a brush, you can then lift the stencil off the furniture to reveal a completed image. Then you can do this again and again on other portions of the same furniture, or on other pieces of furniture. This significantly reduces your time and effort when compared to freehand lettering.
Stenciling is also done within the custom screen printing process. In this case a stencil is attached to a fabric or metal screen. Using ink and a squeegee to spread the ink and force it through the screen and open areas of the stencil, you can produce any number of duplicate images. Screen printing is usually done with a base attached to the screen frame, but this doesn’t always have to be the case. In the late 1970s, when I was working at an art gallery, I saw museum personnel custom screen print paragraphs of type right on the wall as descriptions and explanations of an exhibit they were preparing.
In my fiancee’s case, it looks like either method may have been used. If you decide to look closely at your own printed furniture, use a printer’s loupe and look for especially thick ink. That’s one of the clear and obvious characteristics of custom screen printing ink.
The Bottles and Ceramic Vases
I’m thinking specifically of a set of beer mugs my fiancee found that had been created from brown glass beer bottles. Interestingly enough, although all of them have lettering on the surfaces (quite a bit of type), only one writing sample is upside down. In this case the writing notes that if you can read this glass, you’ve spilled your drink.
Given the thickness of the ink, I would say that all of the glasses had been printed with screen printing ink. If you can create a jig that will stabilize the glasses and then spin them around their central axis, you can use a flat custom screen printing frame to print on the curved surface of the glass.
Another option, which may have been used for a much larger vase my fiancee found at a thrift store, involves glazes. The word glaze is derived from a Middle English word meaning glass. In the case of the larger vase, my educated guess would be that the words were painted on with liquid glaze of a particular color, and then the vase was fired in a kiln at an especially high temperature. A glaze seals the surface of earthenware pottery making it impervious to liquids. It can also be used to add a color (or paint an image or add type letterforms, as in this case).
As an alternative, it is possible to print the imagery and/or type (backward, or wrong-reading) on decals and then transfer the images from the backing sheet onto the ceramic piece (printed right-reading) prior to kiln firing. As with the example of furniture decorated either with screen printing (serigraphy) or by hand painting over stencils, it is much easier to make multiple copies quickly by using decals than by hand-lettering the words.
The Printed Clock Face
One of the items my fiancee collects is clocks–of all sizes, from tiny ones to clocks used as round table tops to a wall clock maybe three feet in diameter. I used to run around the house replacing batteries as they ran out, but after a certain time I stopped worrying and just kept live batteries in a few centrally located clocks.
The large face of the three-foot clock appears to be an offset lithographic print on paper. Why? Because of the halftone dots I see with my 12-power printer’s loupe and because it has been produced on paper. Thicker items usually (but not always) need printing techniques other than offset lithography due to the intense pressure of the custom printing rollers against the substrate, which could crush a wood (rather than paper) printed clock face.
So most probably the face of this particular clock was printed on paper, which was diecut and then attached to the wood backing with an adhesive prior to being mounted within the round clock structure.
How the Brain Processes Visual Information
The brain is a fascinating organ. Although it is not as cut and dried a process as I’m about to describe, different parts of the brain process different kinds of information. For instance, for the photo at the top of this article (a photo of colorful, printed mugs decorated with both text and imagery), the right side of the brain usually processes spatial, artistic information, while the left side of the brain usually processes more linear, logical information (like words). It has been found, since I first read about this process multiple decades ago, that certain things you might think would be processed in one hemisphere of the brain (perhaps the left hemisphere for logical information) might also have an aesthetic component that is processed by the other side of the brain.
So in the case of my fiancee’s furniture, clock faces, and ceramics incorporating words and numbers more than images, it is quite possible that they intrigue her because they stimulate both the logical side and the artistic side of her brain. (Granted, I know very little about science, but this is nevertheless an interesting thought.)
The Takeaway
I see at least three things you might want to consider if you are a product designer or even just a lover of fine art and graphic art:
- Printing on actual 3D products may be considered either “functional printing” (such as letters on a computer keyboard or other images used to help you operate a device) or aesthetic printing (such as printing to highlight the beauty of the letterforms themselves on the furniture and ceramics my fiancee bought at the thrift stores).
- In producing effective design work, it helps to be aware of these distinctions and to understand how the brain processes different kinds of information in different ways and in different parts of the brain. This awareness can help you communicate more effectively with those who see and respond to your commercial art.
- It helps to approach any physical, 3D-printed item with the following question in mind. “What kind of printing technology would be the most effective and efficient for printing on the object?” Some will lend themselves to offset lithography, some to flexography, some to stenciling, and some to custom screen printing. In many cases both the material on which you are printing and the number of copies you are making will determine your choice of a particular commercial printing technology. Therefore, the more you know about the various options, the better able you will be to choose the most appropriate method.
Posted in Printing | Comments Off on Custom Printing Type Forms on Vases, Furniture, and Bottles
Sunday, May 14th, 2023
Photo purchased from … www.depositphotos.com
Some commercial printing jobs go south. It’s a fact of life. Here are some lessons you might want to consider based on issues I just had with two of my recent print jobs.
That said, it’s actually helpful to approach things in the following manner. Fixing a problem job for a client who is disgruntled, as well as learning something of value for future jobs, makes you a better print buyer than having all jobs run without a hitch.
The Husband-and-Wife Publishing Team
I recently reprinted a 6” x 9” perfect bound literary print book (i.e., with high production values needed to compete with digital books sold at a lower cost) for a husband-and-wife publishing team. I have worked with this client for over ten years. The two principals of the small publisher love the physical nature of the print book, and they share this love with their literary clientele.
Unfortunately, in this case there were three problems.
The first had to do with folds that were slightly off on the French flaps (3.5” extensions to the front and back cover, folded over the front and back inside covers to give the impression that the book has a dust jacket). These also provide room for additional promotional information. Unfortunately, some of these were not absolutely square (or true).
In addition, the color on some of the book covers was not as saturated or intense as on the original printing of this book.
Finally, in spite of my client’s explicit delivery instructions, all copies of the print book came to her and her husband’s house. They should have received 50 samples. Instead, they received 750 books, 700 of which needed to be at the print book distributor’s warehouse halfway across the country.
Needless to say, I asked my clients to check multiple copies of the books from multiple cartons to determine the extent of the color problem and folding problem, but I addressed the shipping problem immediately because their unsold books needed to be at the book distributor yesterday if not sooner.
Fortunately I had the exact email in which my client had set forth her delivery needs, as well as proof that she had sent this email directly to the printer. With this in hand it was easy to get the book printer to provide appropriate labels for the ten boxes of perfect-bound books to facilitate UPS’s picking them up and re-delivering them immediately.
My client was happy with the speedy service. Having the books picked up and rerouted went a long way.
Furthermore, the printer’s rep for this book offered my client a discount on the problematic books with folding issues and color intensity issues. She hadn’t been asked for this discount. She offered it on her own. My client was especially touched and felt well taken care of in spite of the custom printing issues. At the moment, while her books are being rerouted to the book distributor, my client is tallying up the number of less than perfect books, which already seems to be a smaller number than initially expected.
Moreover, I asked my client to compare the printed book covers to the contract proof she had received from the printer. (The printer had produced two copies: one for their use and one for hers, so my client still had a copy of the cover proof.) Apparently the proof, which my client had initially told me she had liked, did match the final books she had received.
So as the book printer’s speedy attention to making my client and her husband happy moved forward, the scope of the problems gradually decreased.
What We Can Learn
When things go wrong with shipping, which does happen, it always helps to have the email in which you specifically stated what printed copies had to go to which destination point. In fact, it may help to make sure this information is also noted on the printer’s proof sign-off sheet, or to confirm in some other way this information before the cartons ship out. If anything changes, then update the delivery spec sheet and send it to the book printer noting explicitly that it is an update to the original information.
Regarding my client’s color issues and folding issues, I had made an initial assumption that might not have been adequate. I had assumed the art files had been correct for the reprint. What I should have also done is ask my client to send a sample from the initial printing of the book for the printer to match. A physical copy when compared to the ink density and folding issues would have shown exactly what my client wanted. Sometimes the printer’s physical proof and the original art files are not enough (particularly when you’re trying to match a prior press run).
The Fashionista’s Color Chin Cards
I mentioned this job in several past issues of the PIE Blog. My client is producing a set of laminated chin cards. These cards (with a series of full-bleed solid ink hues showing what fabric colors and makeup will be complementary to one’s complexion when held under one’s chin) are 8.5” x 11”, laminated on both sides, and printed on card stock.
I had expressed concern that if produced on a laser printer these cards might have banding problems (uneven lay-down of toner showing streaks through the solid colors). After all, the colors were full bleed, on large cards, with heavy coverage of the colored toner particles. Foreseeing any problems with such banding was my goal in suggesting my client purchase an initial complete set as a proof. Unfortunately, I was right. (I’m usually much happier when I’m wrong.) There was banding. So my client gave the job to another printer.
Rather than lose a client entirely (since she also produces much smaller color swatch books based on the same color system), I thought ahead.
I thought about the HP Indigo color laser printer, which uses much smaller toner particles suspended in fuser oil (rather than the much larger dry color toner particles used in many other digital laser presses). I thought this might minimize banding. I realized this flaw occurs in many cases where the color is built up with multiple layers of cyan, magenta, yellow, and black toner particles, and thought it would be more evident in a large space, like an 8.5” x 11” full-bleed chin card. But I thought the HP Indigo process might be more forgiving.
That said, I also thought back to the three times this job had been printed without incident, without banding. The printer I had used had actually brokered out this digital job himself. I happened to know the kind of press he had used (a Fujifilm J Press, a production inkjet press, rather than the HP Indigo, the color laser digital press I was considering).
I thought a bit further and spoke with a printer who has this digital press. Apparently, since it is an inkjet press, it builds color with minuscule dots (more or less of the cyan, magenta, yellow, or black ink just means more or fewer minuscule dots). This was the technology used for the prior three printings of the chin cards without any visible banding.
At this point, although I know that even inkjet print heads clog from time to time and yield poor quality printing work, I still thought this might be a future option to win back this job. Granted, it will require my client’s seeing samples from this J Press and probably also paying for a full-size, complete proof of all the color chin cards. Since this job is reprinted at least once a year, it doesn’t hurt to have a new printer in the wings who can potentially produce quality work, with consistent color and no banding, for each reprint.
What We Can Learn
Never give up. Actually, that’s the gist of the lecture I received from my fiancee.
My own suggestions have to do with research and being open to multiple technologies. My client’s job was too small (too short a press run, 50 sets of 72 pages, back and front, or 36 leaves) for offset lithography. The only option was digital. That said, there was traditional dry toner (the toner particles don’t always land as precisely as offset ink). There was HP Indigo’s minuscule toner particles suspended in fuser oil. And there was production inkjet, with colors built from process inks using minuscule stochastic spots rather than much larger halftone dots.
At least this is my current assessment, my hypothesis. But I do have to see this hypothesis confirmed with printer’s samples and a physical proof.
I urge you to take the same approach with the commercial printing jobs you buy.
Posted in PrintBuying, Printing | Comments Off on Custom Printing: What to Do When a Job Goes South, Chapter 2
Sunday, March 12th, 2023

Photo purchased from … www.depositphotos.com
I’m a great believer in marriage. Weddings give you an opportunity to use one of the most artistic printing techniques (as well as one of the oldest) in existence: engraving. In fact, since my fiancee and I teach art to autistic students, I could very well share this same information with our students, because there is a long history of engraving in the fine arts as well as the graphic arts.
Engraving is an art form that lends itself to special occasions, such as weddings. However, it is also quite appropriate for corporate materials such as invitations to special gala events, letterhead, and business cards.
The Engraving Technique
Engraving is the opposite of letterpress. In letterpress, raised image areas and text print content onto commercial printing paper. In engraving, lines of images and text are incised into either steel or copper printing plates. Thick ink is wiped onto the plate and then wiped off, leaving ink only in the incised image areas.
Keep in mind that the dimensions of the engraving work tend to be very small (such as the size of a business card or invitation). When the intense pressure of the engraving press is applied, it forces the custom printing paper into the incised type and image areas of the inked plate, and the paper absorbs the ink. At the same time, the image areas are raised slightly by the intense pressure. So when the final piece comes off the press, the back of the sheet is slightly indented behind the typescript letters, and on the front of the sheet these very same printed elements are raised.
To compare this to the most common current form of commercial printing other than digital printing (i.e., offset lithography), offset printing plates are flat (neither raised like letterpress nor lowered, or incised, like engraving). In offset printing, what keeps the ink confined to the image areas is a chemical property of oil and water (or oily ink and water). That is, oil and water do not mix, so it is possible to separate them on a flat commercial printing plate.
To compare all three custom printing techniques in this light, engraving is an “intaglio” (recessed-image) printing process, offset lithography is a “planographic” (flat-image) printing process, and letterpress is a “relief” (raised-image) printing process.
Beyond the aesthetics of a special business card or invitation, engraving provides the sharpest printed impressions of any custom printing technique. Therefore, it is used to print currency and stock certificates as well.
Engraving plates are either steel or copper. According to my go-to book on printing, Mark Beach and Eric Kenly’s Getting It Printed, steel plates will allow for much longer press runs than copper plates. (Copper plates are usually good for press runs up to 5,000 copies, and then they deteriorate.) However, engravers usually only offer a few typefaces on steel plates.
Engraving plates can be imaged in the following ways:
- The lines can be incised by hand using tools. (This is used for steel plates.)
- The type and imagery (very simple line drawings, for instance) can be chemically burned into the metal if you’re starting with a “mechanical” (hard copy, actual type and imagery pasted up on paper), which is pretty much an extinct option now. (This is used for copper plates.)
- The type and imagery can be burned into the commercial printing plate with a laser from digital art files (more common). (This is used for copper plates.)
When you’re designing for engraving, keep in mind that the inks are thick and opaque, which can make them a great choice for a darker paper stock. (They are more striking than transparent offset inks printed on darker commercial printing paper.) Also they come in gloss and dull formulations, which will give you options. For instance, the gloss inks may even appear a bit metallic.
One of the most important things to remember if you are buying engraving services is to choose an appropriate, high-quality paper that will showcase the aesthetics of engraving. Let your printer help you choose the paper stock.
Another thing to remember is to ask the printer to confirm the heat tolerance of your final printed product if you intend to print names and addresses on a laser printer. In some cases the high heat of a laser printer could damage the engraved product.
Engraving requires intense pressure, as noted earlier, so it lends itself to small presses printing small images. Getting It Printed notes that anything larger than a 4” x 8” area would require an additional pass through the press. (For instance, your printer may do one pass for the top of your letterhead and another pass for the bottom of your letterhead.)
An Option to Engraving
But what if you can’t afford the expense of engraving? Or maybe you want something for larger-format printed pieces. What are your options?
Thermography is a hybrid printing technique that actually starts with offset lithography. You may in fact have seen thermographically printed business cards and thought they were engraved, because the type and imagery are raised as in engraving. (One key give-away, however, is that the underside of the printing paper is not indented behind the type letterforms.)
Thermography starts with slow-drying offset printing inks that are dusted with thermographic resin powder after the offset printing step. This powder sticks to the offset ink and “takes on the color of the underlying ink, but may not match perfectly” (Getting It Printed, p. 138). Excess thermography powder (powder not covering type or other image areas) is then vacuumed away, and the printed piece is heated. Heat melts the thermography powder into the offset ink, but it also causes the powder to bubble up (hence the raised effect that simulates engraving).
In my experience, two things are important to remember with thermography. The first is to keep things simple. You can create an attractive, raised effect, but if you try to reproduce anything but the coarsest halftone screens, the screens may plug up and look uneven. (I personally did this once about thirty years ago, so I encourage you to learn from my mistake.)
Also, there is a chance of your receiving a printed piece in which the ink looks stippled (a pattern of tiny indentations, like the skin of an orange peel). So ask your printer for samples, and make sure he is skilled in thermography and can avoid this stippled effect. You want the powder to rise as it is heated, and you want a uniformly glossy appearance, so your printer must be able to control the offset ink application, heat, and thermography powder application.
That said, you don’t have to use thermography only for business cards or letterhead. Getting It Printed suggests applying thermographic printing to perfect-bound print book covers, for instance, perhaps highlighting the title of the book by making it colorful, raised, and textured.
If you choose thermography for a printed item, you have a choice of fine, medium, or coarse thermography powders, so you can use fine resign powder for fine lines and thicker granules for larger areas of type or color solids. However, too large an area of color thermography might result in a blistered appearance. Also, printing across a fold will result in cracking of the dried thermographic powder.
And finally, thermography does not have the highest rub resistance and can therefore be scratched. Also, thermographically printed ink does not tolerate the heat of a laser printer and can lose its “rise and luster” (Getting It Printed, p. 139) if heated.
Posted in Printing | Comments Off on Custom Printing: Choosing Engraving or Thermography
Monday, February 27th, 2023

Photo purchased from … www.depositphotos.com
Thirty years ago I was promoted from designing print books to serving as the art director and production manager of a government education nonprofit organization. When our best designer got a new job, I took over all of her promotional design work and learned to use Quark XPress (page composition software). It was one of the more intensely educational periods of my professional life.
One of the promo items I produced was a 16-page catalog on 70# gloss text with a 100# gloss text cover. The tall and narrow format was approximately 6 1/8” x 10 7/8”. It was a saddle stitched, four-color product with a press run of between 40,000 and 60,000 copies. The nonprofit was flush at the time, and marketing was viewed as an investment. Also, it was before the wide use of the internet for marketing.
To get back to the size, we chose an odd format because it just fit the US Post Office’s definition of a letter. Anything larger (even 1/8”) would have been a “flat” and would have cost more to mail. But in addition, we chose the size because it fit exactly within the roll width and cut off of the heatset web press owned by one of our best commercial printing suppliers. (More specifically, eight pages of the catalog fit exactly on each side of a sheet cut from the web roll, allowing room for bleeds and printer’s marks.)
And for such a long run (the number of pages multiplied by the press run), producing the job on a heatset web was faster and cheaper than printing the job on a sheetfed press. Moreover, since it was produced on gloss stock, we needed a heatset web rather than a non-heatset web (because we needed the ovens to cure the ink through oxidation). So this was exactly the right custom printing press for the job.
Proofing and Dot Gain
When I started regularly checking proofs for this catalog (a repeat job produced every six months), the first thing that struck me was that the proofs were too light. The b/w halftones, the 4-color images, the area screens, everything. At first I was upset, and then the printer explained to me that heatset web presses have higher than usual dot gain, so the separations need to be “opened up” or burned to negatives, proofs, and plates with lower density, so the final printed product would look as I had intended it to look. (We still used negatives back then.)
So I went to school on the subject.
“Separations” were the four sets of negatives and plates, one set for each of the process colors: cyan, magenta, yellow, and black. “Opened up” meant that the halftone dots of any of the process colors would be reduced slightly in size. And “dot gain” meant that certain types of presses, certain printing processes, and certain types of paper will result to a greater or lesser extent in the enlarging of halftone dots on press. (This is also known as “tone value increase.”)
And the heatset web printer’s solution (opening the separations) was the correct approach to eliminate the dot gain problem.
How Does Dot Gain Present Itself?
In the case of my employer’s catalog of government education print books, the overall darkening of all colors that would have occurred had the printer not opened up the separations would have been the result of the dot gain.
But this is not all that can happen.
According to my go-to book on printing, Getting It Printed by Eric Kenly and Mark Beach, “Halftones and separations lose detail, colors shift in separations, screen tints print too dark, color builds don’t match swatches, chokes and spreads [trapping] don’t function properly, and fine lines drop out when printed as reverses” (Getting It Printed, page 65).
How Is Dot Gain Measured?
According to Getting It Printed, if you start with a 50 percent dot and you have 10 percent dot gain, the halftone dot would now be a 60 percent dot (50 plus 10, not 50 plus 10 percent, as I understand it). Unfortunately, dot gain can be different in different screen percentages of a printed product, since different sized halftone dots grow in different amounts (smaller dots grow more than larger ones, for instance).
Plus, if you think about it, the art file for a double-page spread of one of your commercial printing projects, let’s say a print book, may include multiple items that you have generated in different programs (such as InDesign, Photoshop, Illustrator, etc.) prior to placing them in the art file. This can result in different amounts of dot gain in different portions of a page spread.
What Increases or Decreases Dot Gain?
First of all, according to my research, dot gain will be reflected in the series of printer’s marks on your press sheet outside the live matter art. This notation, showing the growth of the dots, may be further broken down into highlights, quarter tones, halftones, etc. So your printer is already actively looking for this problem and seeking to remedy it.
That said, there are certain elements of commercial printing that will make this problem better or worse. According to Getting It Printed:
- Uncoated paper results in more dot gain than coated paper. This is because the ink seeps into the paper fibers and causes the dots to grow. In a similar vein, calendered paper (run between metal rollers during the paper-making process) experiences less dot gain than uncalendered paper. This is because the metal calender rollers create a harder paper surface, and a harder surface allows for less ink absorption into the paper fibers.
- Different printing technologies, such as offset, flexography, gravure, and screen printing, have different amounts of dot gain.
- Different screening algorithms yield different amounts of dot gain. For instance, FM or stochastic screening uses very tiny halftone dots, with more dots in a dark area and fewer dots in a light area. In contrast, AM or traditional screening uses a specified number of dots per square inch, and they are either larger or smaller depending on the percentage of the screen. So these different sized dots will have different amounts of dot gain.
- Higher halftone screen rulings (maybe up to 200 lines-per-inch for coated paper but only 85 lines-per-inch for newsprint) will produce more dot gain since smaller dots grow more than larger dots.
- Different kinds of offset presses cause different amounts of dot gain. For instance, a web offset press is likely to have more dot gain than a sheetfed offset press.
- Inks make a difference. For instance, soy inks produce less dot gain than petroleum-based inks.
- Chemistry makes a difference. Waterless offset printing, which uses silicone-coated plates and no water solution, minimizes dot gain when compared to traditional offset commercial printing.
What Does This Mean to You?
There are prepress applications that deal with dot gain, but since you may have problems in one area of a page and not in another, and since you are probably inserting other kinds of files into your page layout files, my personal recommendation is the following:
- Assume the printer is checking the dot gain charts on the press sheets (printers marks outside of the live-matter page) and adjusting for the dot gain (even if that means burning new printing plates).
- If the quality needs to be above “basic” or “good” (i.e., “showcase” or “premium”), consider attending a press inspection at your printer’s plant, where you can see the press sheets during the press run and make comments and request changes. Let your commercial printing supplier know your plans at the time of the request for quote, however, since a press inspection slows down the overall process (and ostensibly gets factored into a higher price).
- Make your concerns known to your custom printing vendor and ask for feedback if your job needs to be a premium or showcase printed product.
Personally, I’d avoid trying to compensate for dot gain yourself. There are too many variables, and this is the expertise you’re paying your pressmen to bring to your work.
Posted in Printing | Comments Off on Custom Printing: A Primer on Dot Gain in Printing
Sunday, February 19th, 2023
Photo purchased from … www.depositphotos.com
About two decades ago I was a custom printing consultant helping a client produce periodicals analyzing the actions of Congress in Washington, DC. It was a Friday night, and their flagship publication was on press at a local printer on a heatset web press. A tornado came in at that very moment and tore the roof off the commercial printing plant. When I called the sales rep, he said my client’s company was “on its own.” The job would not be printed and sent off to its paying customers that night.
So I contacted a local sheetfed printer I knew wanted the contract for this weekly magazine very, very badly. When I called the plant manager, who was at a bachelor party at the time, he agreed to be my client’s white knight. I sweetened the pot by noting that his successful completion of this job would probably create a vacuum that would suck all of my client’s jobs out of the web-press plant into his sheetfed custom printing plant.
He coordinated a new transfer of all digital data from my client’s office to his shop and produced the magazine via sheetfed lithography. Paying customers received a magazine that looked far better than prior issues. It came out on time as though nothing had happened. Within a year or so, the new printer was producing all of my client’s magazines.
Sheetfed vs. Web
The prior example might read like a fairy tale, but it’s actually true. That said, it was more expensive to print the magazine via sheetfed offset lithography than heatset-web offset lithography. Here are the differences and the reasons to choose one kind of press or the other for your own commercial printing work.
Both kinds of presses print via offset lithography, in which image areas on a flat custom printing plate are treated to receive ink, while non-image areas are treated to repel ink. When the press is running, ink is transferred from a printing plate to a rubber blanket and from the blanket to the paper (hence the term “offset”). So in this particular way, web presses and sheetfed presses are similar.
That said, paper is fed into a sheetfed press as individual sheets stacked in a pile at the front end of the press (even if they had initially come from a roll and had been cut into sheets). The sheets are pulled through all inking units, where they receive ink from the plates and blankets. Stacks of printed press sheets (printed on one side) exit the press and are stored for the ink to dry (via absorption into the paper and/or oxidation into the air, depending on the paper in use). Then the piles of press sheets are turned over and run through the press again to print the opposite side of the sheet (called “backing up the sheet”). Final printed sheets (printed both sides) are then brought into the finishing department for folding, trimming, and other post-press work.
In contrast, on a web offset press, paper comes from a roll. As the press runs, the ribbon of paper coming off the roll is held in tension as it enters the press. Like a sheetfed press, the web press uses plates and blankets on each inking unit to print the job.
If the paper is uncoated and the quality requirement is low (such as a newspaper or newspaper circular), the web press can be an open web (or non-heatset web). The ink dries through absorption only (ink seeps into the uncoated paper).
If, however, the paper is a coated press sheet (or roll, more accurately), the applied ink (usually four colors for this kind of work) has to be dried differently. So once the ribbon of printing paper from the web roll exits the printing units, it must enter the drying ovens, which flash off the solvent from the printed ink with intense heat (i.e., drying by oxidation rather than absorption), hardening the custom printing ink on the surface of the paper rather than letting it sink into the paper fibers. Then the ribbon of paper (the web) travels between the chill rollers, which bring the paper back to room temperature.
At this print, the web press can actually do some of the finishing work in line, getting the press signatures (in the case of my client’s magazines, for instance) ready for binding (some web presses do some kinds of binding in line as well).
Sheetfed presses can’t do this. (Finishing in this case is done in another department.)
Web presses are lightning fast. My random query on the internet notes that a sheetfed press can print 15,000 impressions per hour, while a web press can print 50,000 impressions per hour. (I don’t know how precise these numbers are, but the gist is that web presses are significantly faster than sheetfed presses.)
Moreover, a web press prints both sides of the roll of paper at one pass, unlike a sheetfed press. Either the ribbon of paper is turned over within the printing process using “turning bars” (with four of the inking units printing one side of the paper and then the other four inking units printing the opposite side), or press rollers, plates, and blankets above and below the web of printing paper print both sides simultaneously. This also speeds up the process dramatically.
But speed has its drawbacks. Even a heatset web press (as opposed to a non-heatset web press, which some people call a coldset web) cannot in most cases match the level of quality produced by highly skilled operators on a sheetfed offset press. (This is why my client’s customers who received the tornado edition of their magazine were knocked off their seats by its quality.)
In contrast, speed does yield cost savings. Sheetfed printing involves separate finishing operations in a different department, and overall it progresses more slowly, so the final bill is usually higher, depending on the total press run.
To illustrate, when I was an art director, my employer printed 60,000 copies of a 384-page (approximately) 6” x 9” perfect-bound print book (twelve 32-page signatures). The text was printed on a web press. I believe the 60,000 covers, since they were small, they could be ganged up on a single press plate, and they had to be of very high quality, were printed on a sheetfed press. I’m not good with math, but it seems to me that at 15,000 impressions per hour vs 50,000 impressions per hour, it would take much, much longer to print twelve 32-page press signatures (twelve separate press runs) on a sheetfed press than on a web offset press.
Why Choose One Press Over Another
If you’re buying printing and deciding what kind of printer to approach for a bid, here are some thoughts:
- If you’re producing a textbook, for instance, as was part of my job as an art director, consider the number of pages multiplied by the number of copies. In my case of 60,000 copies multiplied by 384 pages, that would be 23,040,000 book pages. In my experience, that’s definitely a web-offset commercial printing job.
- If you’re printing 60,000 copies of a 8.5” x 11” flyer that will be laid out (imposed) eight-up on a press sheet (eight final copies per 25” x 38” press sheet), then your final print run is actually only a fraction of the total or 7,500 copies, because out of every press sheet you get eight copies. That would most probably be a sheetfed job.
- Quality. Maybe you wouldn’t print an annual report on even a heatset web press. I wouldn’t. Even if it can run coated paper and four-color process ink work, it probably won’t look quite as dynamic as a sheetfed-printed annual report. However, if you’re producing flyers, forms, brochures, newspapers, newspaper circulars–either a heatset web press (for coated printing paper) or a non-heatset web press (for uncoated printing paper) might be a good bet. The key here is the length of the press run.
- So back to press runs. If you’re unsure, ask your printer. But my random check on the internet suggests 10,000 to 15,000 copies as a starting point for web offset, for magazines and brochures. While I would definitely agree with their assessment as it pertains to magazines (multiple custom printing press signatures multiplied by 10,000 or 15,000 copies), I think for brochures or any other work that can be ganged up on a press sheet, your target totals for choosing web offset lithography over sheetfed lithography would be much higher.
But it never hurts to ask your printer.
Posted in Printing | 2 Comments »
Sunday, October 9th, 2022
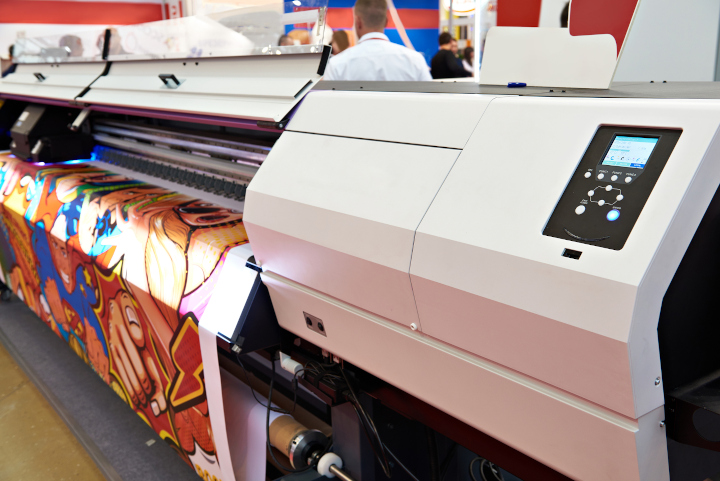
Photo purchased from … www.depositphotos.com
I was excited to notice recently (in one of the press releases and articles Google Aggregator feeds me every day) that PRINTING United Expo will occur later this month in Las Vegas.
I realize I’m a printing nerd, so I will endeavor to explain what this means for the industry in general and AGFA in particular, and more specifically what it means for graphic designers, production managers, and art directors.
PRINTING United Expo
First of all, after the Covid lockdown, I think it’s encouraging to have any general convention in any industry physically open to the public. It allows the free exchange of ideas again via a more personal, immediate venue than the Internet, particularly since you, or any other potential convention-goers, will be able to also physically see all of the new commercial printing equipment. (Personally, I think it’s great that you can view YouTube videos of any printing and finishing operation, but it does help, immeasurably, to actually see these in person and be able to ask questions.)
So, according to a PRINTING United Expo article entitled “PRINTING United Expo” (at https://10times.com/e1z0-r3sx-0z4z), “PRINTING United Expo is the only all-segment expo in the Western Hemisphere in 2022.” Another PRINTING United Expo article entitled “PRINTING United Las Vegas” (at https://www.tradefairdates.com/PRINTING+United-M1633/Las+Vegas.html) notes that “PRINTING United…presents new ideas, applications, and markets for specialty imagers—whether you’re interested in graphic(s) or garments, digital or screen. See the leading suppliers showcasing the broadest range of specialty printing and imaging technology.”
What this means is that experts in the field, general practitioners of the various print-related disciplines, and current and new equipment will all be in the same place at the same time. People will learn from each other, make connections, and presumably even buy equipment for their print shops.
More importantly, as the first article notes, this is an “all-segment expo.” What that means is that you won’t just learn about the separate, new pieces of equipment, but you will be able to see them operating together. This is unusual, since at other conventions you might see a particular press by itself but not see how it can be connected to appropriate finishing equipment to create an efficient workflow.
Agfa’s Participation in PRINTING United Expo
Agfa is a huge player in this market, and the third article in particular, “Agfa to Demo Latest Inkjet Technology at PRINTING United” (found at www.wideformatonline.com), will give you a comprehensive listing of the innovations you’ll see if you attend the trade show.
First of all, Agfa is focusing on packaging and textile printing, which are especially active venues within the commercial printing field, growing exponentially year over year.
Here are some highlights noted in the article. They address new inkjet equipment, new dye sublimation equipment, robotics being used with the new equipment on the pressroom floor, web-to-print solutions, automated preflight solutions, workflow software (such as Apogee) that control all aspects of the production process on a “meta” level, developments that increase control over (and the accuracy of) tight ink register, and waste reduction.
So in terms of the benefits of Agfa’s new products for suppliers, the new offerings will improve overall print job planning and management, reduce paper and ink consumption, increase accuracy of color and register, and reduce make-ready times. All of this will boost quality and efficiency, allowing print vendors to do more in less time. And their customers will benefit from all of this.
The Specifics
Dye Sub
Based on its description in the article, “Agfa to Demo Latest Inkjet Technology at PRINTING United,” the new product that interests me the most is the Agfa Avinci CX3200. This is a dye sublimation printer. That means you can print on polyester fabric, which is noteworthy for two reasons.
First, digital fabric printing is very hot at the moment. You can print on garments (or fabric that can be cut and sewn into garments). But you can also print on fabric that can be incorporated into interior design work. Everything from wall coverings to bedding. To date the rule of thumb, as I have understood it, has been to use direct inkjet printing for cotton fabric and dye sublimation for commercial printing on polyester (let’s say for a promotional flag). Until recently, the only way to do dye sublimation was to first print the ink on a transfer sheet and then, as a second step, to transfer the image from the transfer sheet to the fabric substrate using high heat and pressure.
In contrast to this approach, which required extra time and equipment (when compared to direct inkjet custom printing), the new breed of dye sublimation printers (such as Agfa’s Avinci CX3200) can print directly on the final polyester substrate. That said, this printer can also print on a transfer sheet, if you want to use the printed product for backlit applications with deep, rich black pigments, or if you need to keep stretch fabrics from moving during the custom printing process.
So now you have more options.
Flatbed Inkjet
The next Agfa product I want to highlight is Agfa’s Inca Oncet X3 inkjet printer. Agfa bought Inca Digital Printers, and it has improved this Inca product in the following ways:
- The Inca Onset X3 HS is faster. It can now print 15,600 square feet per hour (“Agfa to Demo Latest Inkjet Technology at PRINTING United”).
- The Inca Onset X3 is more reliable, with “a virtual lack of downtime” (“Agfa to Demo Latest Inkjet Technology at PRINTING United”) and the ability to run 24/7.
- The Inca Onset X3 can be prepped and ready to go faster. According to “Agfa to Demo Latest Inkjet Technology at PRINTING United,” it takes only 30 seconds to set up a job.
- The flatbed Inca Onset X3 press incorporates robotics into the production process.
- The number of acceptable substrates have increased, including corrugated board (a good omen since packaging is such a high-growth venue in the commercial printing industry).
Again, all of this points to improved efficiency and quality and therefore increased revenue for suppliers.
Roll-to-Roll Printing
The third and final product I want to highlight is the Jeti Tauro H3300 UHS LED.
This is a roll-to-roll printer that can accept up to 1,500 lb. paper rolls for “unattended automated double-sided roll printing” (“Agfa to Demo Latest Inkjet Technology at PRINTING United”). The Jeti Tauro uses an “integrated camera system [that] reads QR codes, generated by the user interface of the printer, to identify the exact location of the image and adjust the print position at the start of every job, ensuring front-to-back accuracy of +/-3mm over 300 feet” (“Agfa to Demo Latest Inkjet Technology at PRINTING United”).
What this means is that the precision of the equipment has improved to the extent that ink placement can be controlled precisely (presumably coming very close to or matching the precision of offset printing), and this can be done without operator intervention. The Jeti Tauro camera system keeps everything right (this is presumably analogous to the closed-feedback-loop, electric-eye mechanisms that automatically ensure the precision of offset presses). And automation drives up throughput without sacrificing quality.
The Takeaway
If you are a designer, you may be asking yourself how this will affect you. This is my answer. If Agfa is developing and improving dye sublimation and inkjet printing to support the packaging and fabric commercial printing industries, these are the venues that will demand your design skills.
If you’re a production manager or art director, the same holds true for you.
And if you’re a printer, Agfa is helping you chart a course for the expansion of your business and an increase in your profits.
Posted in Printing | Comments Off on Custom Printing: Update on PRINTING United Expo
|
|